WordPress is a flexible content management system for creating a blog with posts, websites with pages or even online shops with many products. If your website grows over time, it will become a bit messy, because WordPress only offers a list or grid view in the backend to see all created content. But a WordPress plugin called Real Category Management allows you to organize your content in folders. In this article we take a deep look into the plugin and learn how you can easily organize your WordPress posts, pages, products and other custom post types with folders.
Install Real Category Management for better organization
You need the Real Category Management plugin to get folders for all (custom) post types. It is a premium plugin for a few dollars, but it saves you a lot of time and provides updates and support for a one-time payment.
- Go to codecanyon.net to buy Real Category Management. Before buying the plugin, you can create a free sandbox to test all functions of the plugin and see if it is suitable for your purpose.
- Download the plugin after purchase and unpack the ZIP file.
- In the created folder, you will find user documentation and the plugin itself as a ZIP file. You can upload the plugin to your website and then activate it in the list of plugins in your WordPress backend.
- In addition to the plug-in source code and documentation, you must also download your purchase code. A detailed description of where to download them can be found in the Envato Market knowledge base.
- Go to
Pluginsin your WordPress backend and enter the purchase code to activate your Real Category Management license.
Basic functionality of Real Category Management explained by organzing posts
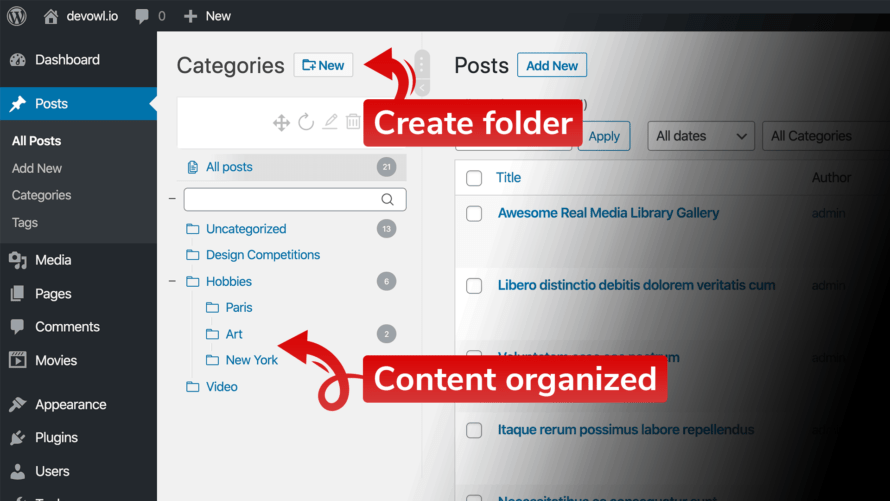
You should now be able to use the Real Category Management features to organize your content in folders. If you go to posts in your WordPress backend, you should have an additional sidebar on the left.
If you have already created categories for your posts before installing the plugin, you will see all categories as folders in the sidebar. Your posts are already organized in these folders according to their categories.
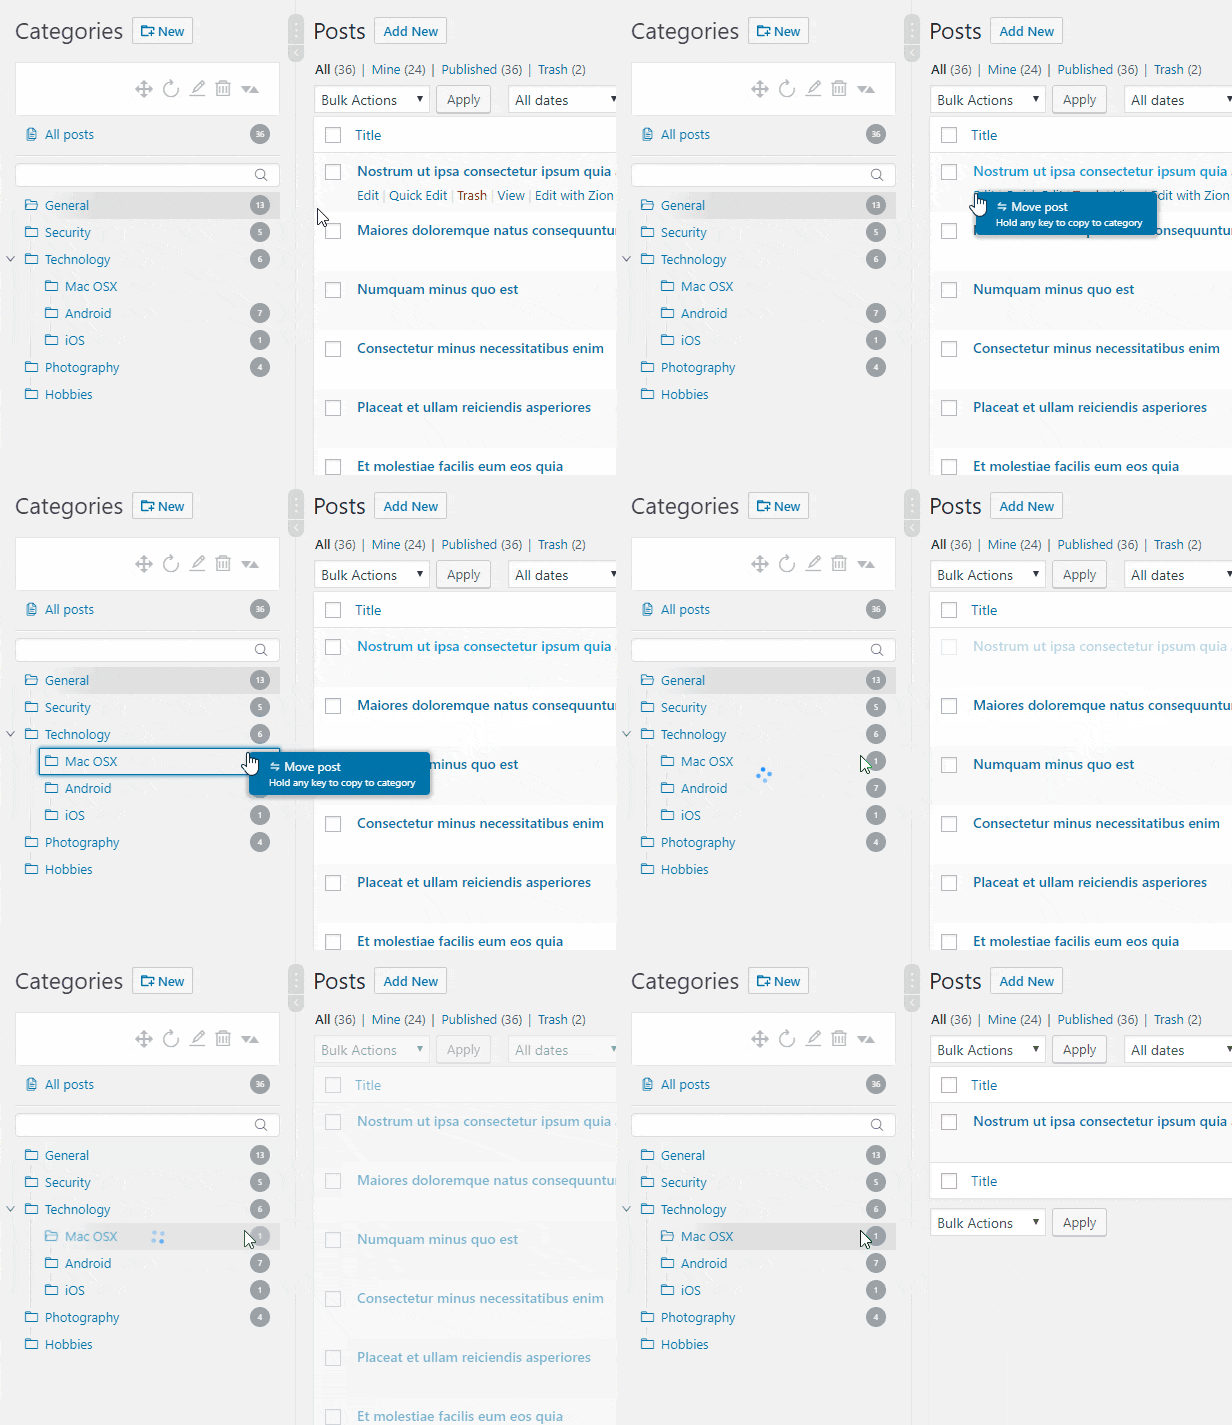
Real Category Management uses categories to organize all kinds of content. Therefore, if you assign your post to another category, it is automatically moved to the appropriate folder. The opposite way works the same. If you drag and drop a post into another category, it is automatically assigned to that category. In case you want to assign a post to more than one category by dragging and dropping, just press the SHIFT key while dragging and dropping, and it will not be moved but “copied” (assigned) to the other category as well.
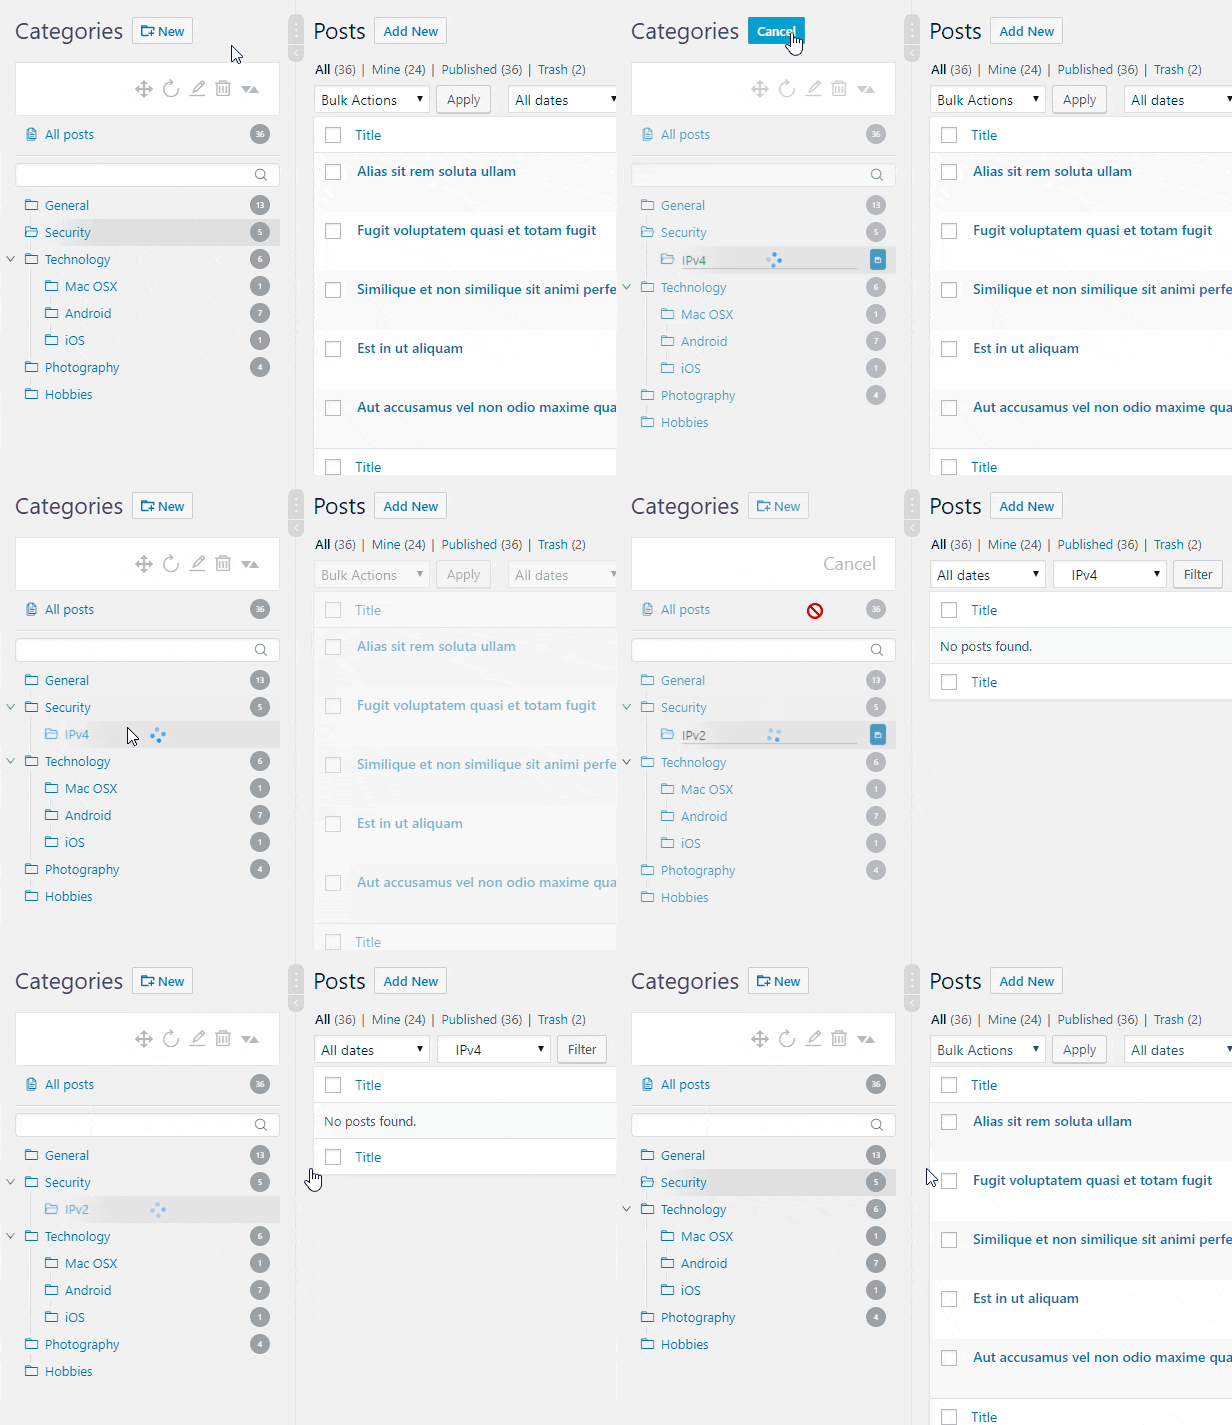
If you want to create a new folder (category), simply click the + New button at the top of the sidebar and select the category name.
Pretty intuitive to organize your posts in folders in WordPress, isn’t it? This works the same way with posts, (WooCommerce) products and all other custom post types like projects, customers, movies, etc.
Sort WooCommerce products by product attributes
For e-commerce merchants, the extended support for WooCommerce products is particularly interesting. Most of the online shops powered by WordPress and WooCommerce have product attributes activated to filter products by e.g. color, size or brand. If you have not yet activated this feature, you can do so in your WordPress backend by going to WooCommerce > Settings > Products and activate the Enable hierarchical product attributes option.
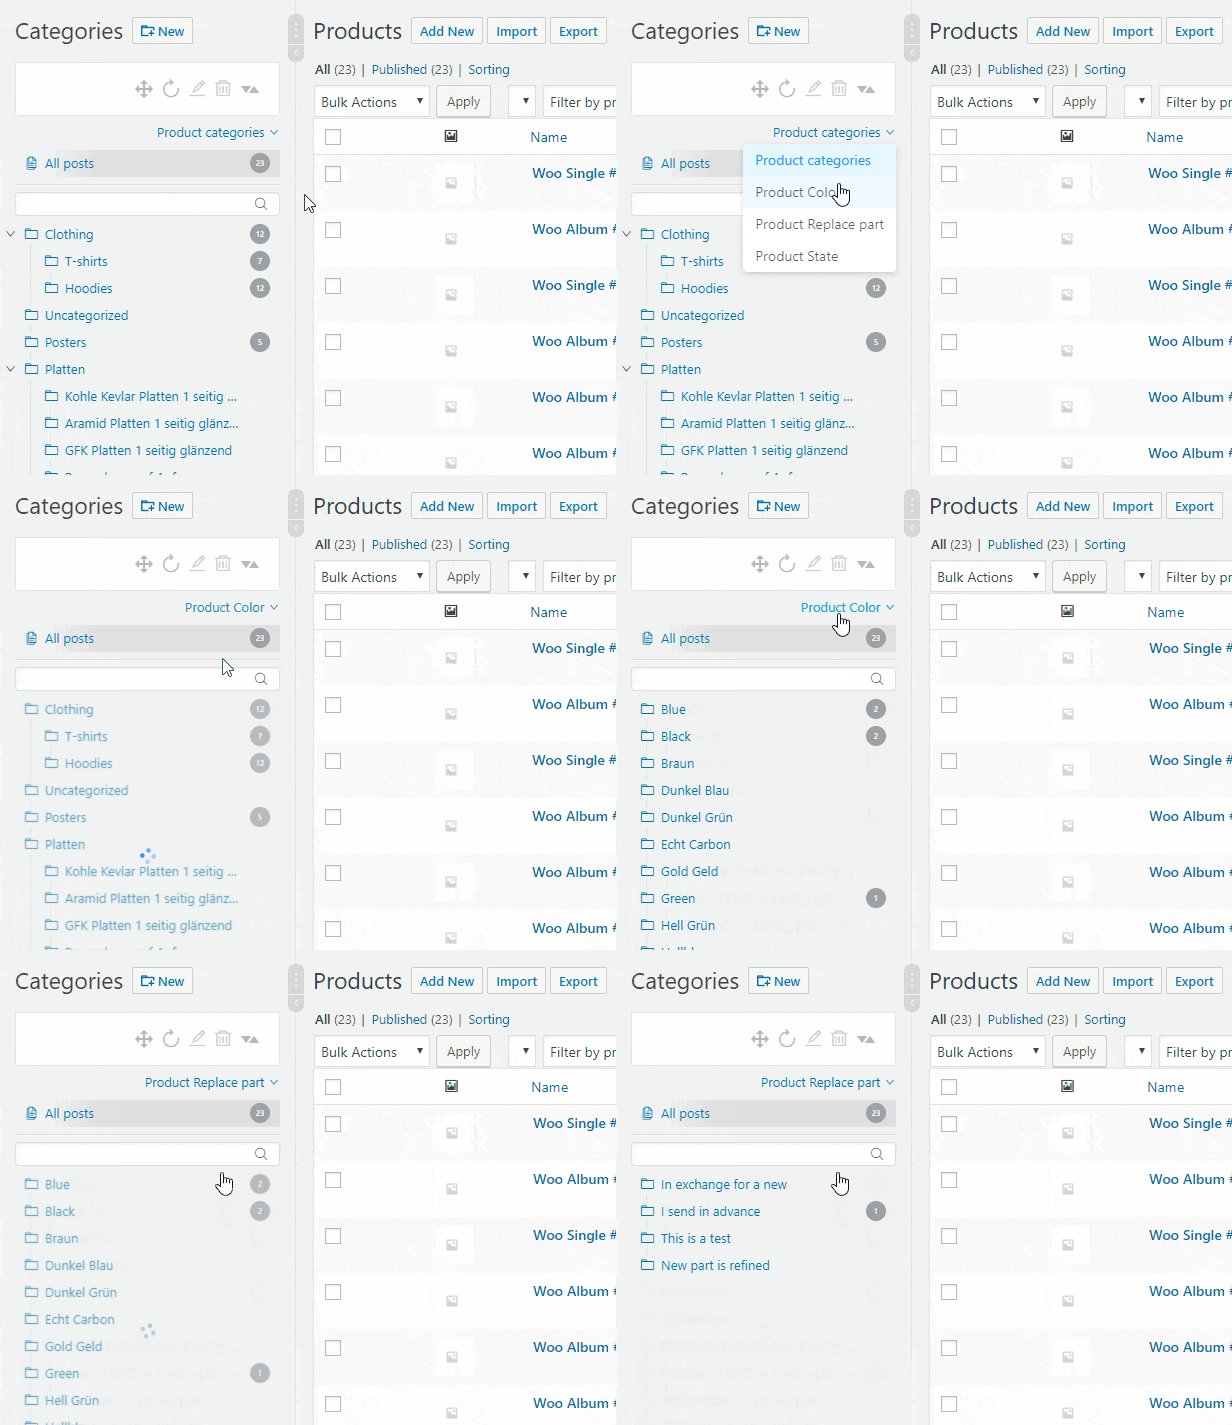
Real Category Management does not allow you to view your products only by their category, but you can use the product attributes to see all products organized by the selected attribute in folders. Especially for larger online shops this is a quite nice feature that allows you to easily see all products of a certain type and e.g. improve the product description of these products.
No category/folder sidebar for custom post type? Organize in folders by creating categories for the post type!
Many themes and plugins introduce their own custom post types, e.g. team members, events or movies. These post types may, but not must, come with their hierarchical taxonomy. A hierarchical taxonomy is a type of structure, as you know the categories in standard WordPress posts, that allows you to assign a content element to one or more taxonomies (categories).
If you do not see the sidebar with folders for a custom post type, you know that the hierarchical taxonomy is missing for this custom post type. But don’t worry, you can easily add a hierarchical taxonomy for each custom post type without touching the code:
- Go to
Pluginsin your WordPress backend. - Click on the
Add Newbutton and search for the pluginCustom Post Type UI. - Install and activate the plugin.
- Now you will find an additional menu item
CPT UIin the left sidebar. Go toCPT UI>Add/Edit Taxonomies. - We have to create a new taxonomy (attribute for a post). The
Taxonomy Slug,Plural LabelandSingular Labelis up to you. For example, call the unique slugmovie_category. It is important that you assign the taxonomy in theAttach to Post Typefield to the custom post type that have no hierarchical taxonomy and therefore no folder structure with Real Category Management. You must also set theRewrite Hierarchicalswitch toTrue. This is necessary to build the hierarchical folder structure from it. You can fill or change all other options, but it is not necessary. Finally, save the taxonomy at the end of the form. - Go to the custom post type and you should see the folder tree (without folders, because you have not yet assigned any post to a folder).


