You want to optimize your Facebook advertising campaigns to boost your conversion rate? Then so-called “Facebook Pixels” are exactly the thing for you. No longer an insider tip, tracking pixels are true gold nuggets. With the use of Facebook pixels, you can specifically optimize your Facebook marketing by precisely tracking your website visitors and their behaviour.
In addition to increasing conversions (e.g. purchase completions, registrations, newsletter sign-ups), Facebook pixels can also be excellently used to improve retargeting (recognizing, tagging and tracking the visitor to show them targeted ads).
The WordPress plugin PixelYourSite is considered an excellent solution for easily integrating the Facebook Pixel into a website.
In this article, we show you how to easily integrate Facebook Pixel – and any other pixel – into your website in a privacy-compliant way using Real Cookie Banner.
What is a Facebook Pixel?
Basically, a pixel is a small piece of code or script that is embedded on a website. The pixel is able to communicate with the associated service to optimise your ads. In the case of a Facebook pixel, it is Facebook. You have the option of integrating the pixel into several websites in order to track them individually.
You can also embed the Facebook pixel before you need any data In this way, you can, for example, later display advertisements to users who have visited your website before but have not made a purchase yet.
Using PixelYourSite in a data protection compliant way
The topic of “tracking” sets alarm bells ringing for many internet surfers and especially data protectionists. Therefore, the question arises whether the Facebook pixel can be used in a legally compliant manner with PixelYourSite and, if so, how exactly you have to proceed.
In the following, we will explain to you step by step, using the Facebook Pixel as an example, how you can use PixelYourSite together with our Consent Management Plugin Real Cookie Banner in accordance with the legal requirements.
- Before you can start pixelating like crazy, you first need to download the WordPress Plugin PixelYourSite.
- Then go to the WordPress backend and click on PixelYourSite in the left menu bar.
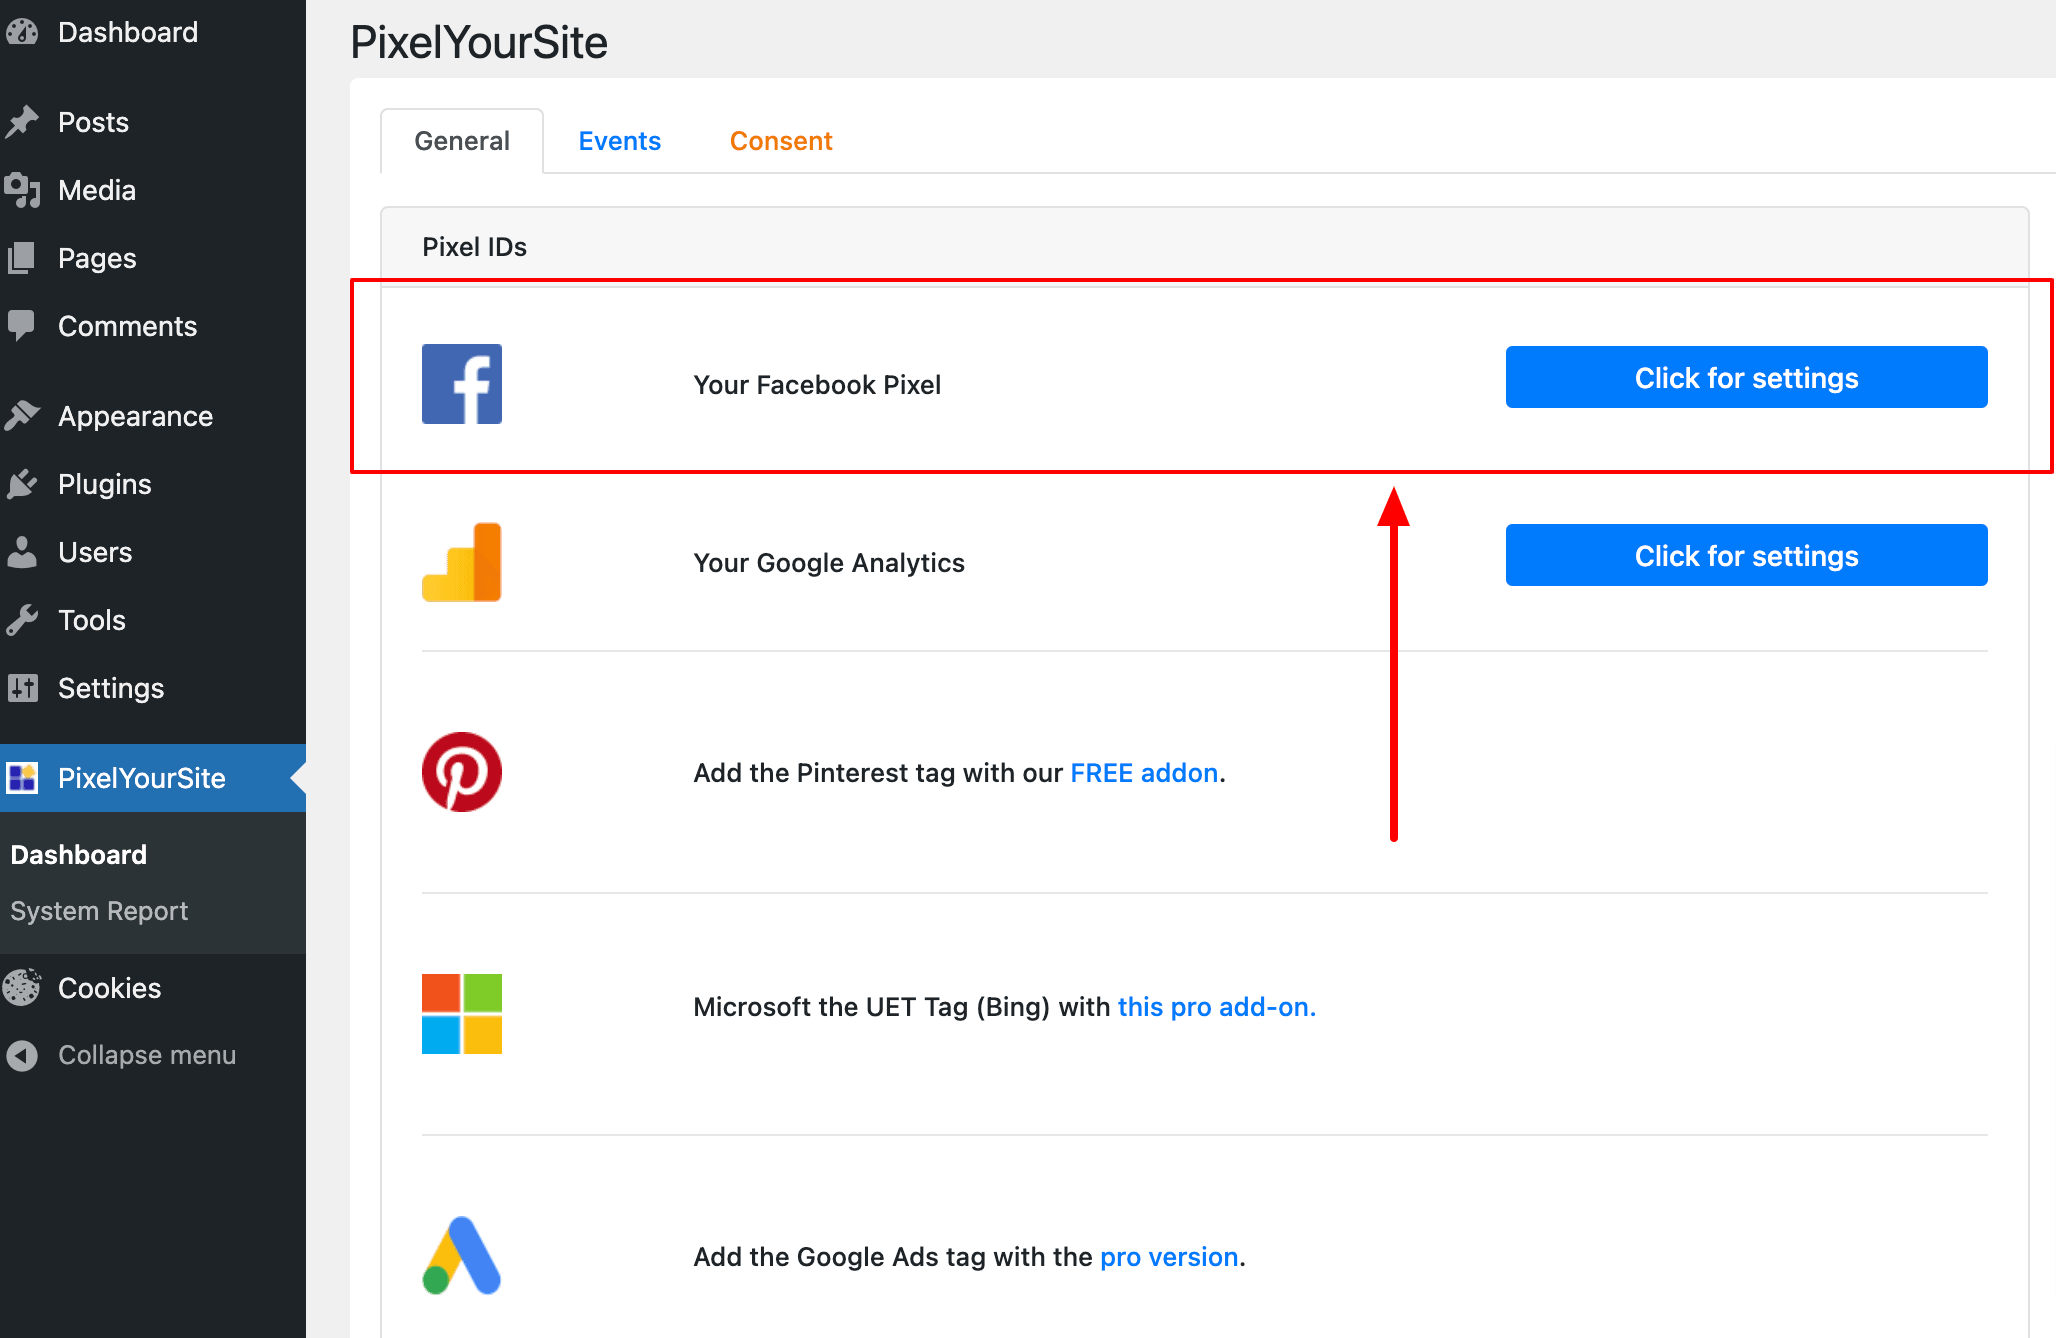
- You will now be shown the three selection options General, Events and Consents, which are highlighted in different colours for better visual differentiation.
- You start with General. Here, you can determine which pixel is to be created. Pixels for frequently used services have already been created. For our example, you select the Facebook pixel (see screenshot). Under Click for Settings you can set the pixel in detail.
- To create a Facebook Pixel, you basically only need your Facebook Pixel ID. The entire code is not required at this point. You can find your Facebook Pixel ID in the Business Manager of your Facebook account, under Event Manager. Copy the ID of the pixel you created and paste it into the corresponding field in PixelYourSite.
- After you have added the ID, scroll down and save your entry (Save settings).
- Under Events, you can then specify which actions are to be triggered by which event, so that the pixel sends data to Facebook – for example, when the user scrolls on a website.
- After you have diligently set the pixel and the associated events, the only thing missing is the Consents setting. In order to be able to use advertising pixel trackers in accordance with the GDPR and ePrivacy Directive you need to obtain consent – e.g. via the Real Cookie Banner. Don’t worry, the integration is super easy!
- Click on Consents and scroll to Real Cookie Banner. Now click on the small icon on the right, at the same height as Real Cookie Banner, to open the settings (see screenshot).

- Here you have the option to activate the Real Cookie Banner integration by activating the button next to GDPR Cookie Consent integration. Now you have activated the Real Cookie Banner integration in PixelYourSite. In order to use the pixels in such a way that they meet the requirements of the GDPR and ePrivacy Directive, one final step is still missing: the creation of the pixel in Real Cookie Banner so that informed consent is obtained from your website visitors.
- If you are using Google Services within PixelYourSite, make sure to enable the option PixelYourSite > Google Tag Settings > General > DataLayer Setting > Disable name transformation for the data layer (use dataLayer).
- Open the plugin Real Cookie Banner in your WordPress backend by clicking on Cookies in the left menu bar.
- Click on Services (Cookies) > Create New Service.
- Search for the service “PixelYourSite”, create it and click “Save” in the service. Note: You must have downloaded the PixelYourSite plugin for this, otherwise it cannot be displayed and used.
- Click on Services (Cookies) > Create New Service again.
- Select the appropriate service template from more than 100 (in this example “Facebook Pixel”). In Real Cookie Banner, all templates are already pre-filled so that you can create the service in just a few clicks. If the service is not available, you can create it individually.
- After you have created the service in Real Cookie Banner, you can use your Facebook pixel on your website legally compliant. PixelYourSite only loads it once your visitor has given their consent.
💡Tip: You can also skip all the steps up to 11 by managing your pixels directly in Real Cookie Banner. The plugin is both less expensive as well as privacy compliant and beginner-friendly.