
You want an SEO-optimized website? Then you definitely can’t avoid the topic of permalinks. But what exactly are permalinks? How do I create a permalink and what effects do they have on your website?
We explain it to you in this article!
What is a permalink and what is it good for?
A permalink is a link by means of which you can call up a sub-page or a post on your website. A permalink is nothing more than a hyperlink and represents the URL structure of a website.
Example: https://devowl.io/blog/
The addition “blog” means that you will find our blog under this URL – permanently. If we create an article on the topic of “cookie banner text” within our blog page, the link will look like this: https://devowl.io/blog/cookie-banner-text. The bold part is often referred to as the “slug”.
Permalinks are hugely important because they tell website visitors what the page is about before they visit the individual URL.
When you create a new page or a new post, WordPress automatically generates a corresponding permalink. This means that the work is already done for you at this point.
👉 It is important to note that all special characters such as full stops, commas or exclamation marks as well as umlauts, the ß, apostrophes and spaces are automatically removed.
In terms of search engine optimization, the permalink is also an important tool that should not be underestimated. Not only does the link give visitors information about the content of the page, but also search engines like Google. If you cleverly include keywords, you will achieve the best rankings in Google and Co.
How can I change a WordPress permalink?
By default, the permalink structure of WordPress website looks like this: https://devowl.io/?p=123
Not only does this not look smart, it is also not very useful in normal cases. Neither your visitors nor search engines can guess the content of the page from the page ID 123. Therefore, it is advisable to change the permalink.
You can either adjust the structure of your permalinks in general or individually.
Change the general structure of the permalinks in WordPress
If you want to change or update the permalink structure of your WordPress website, you can do this with just a few clicks.
- Open your WordPress backend
- Click on Settings > Permalinks in the menu on the left
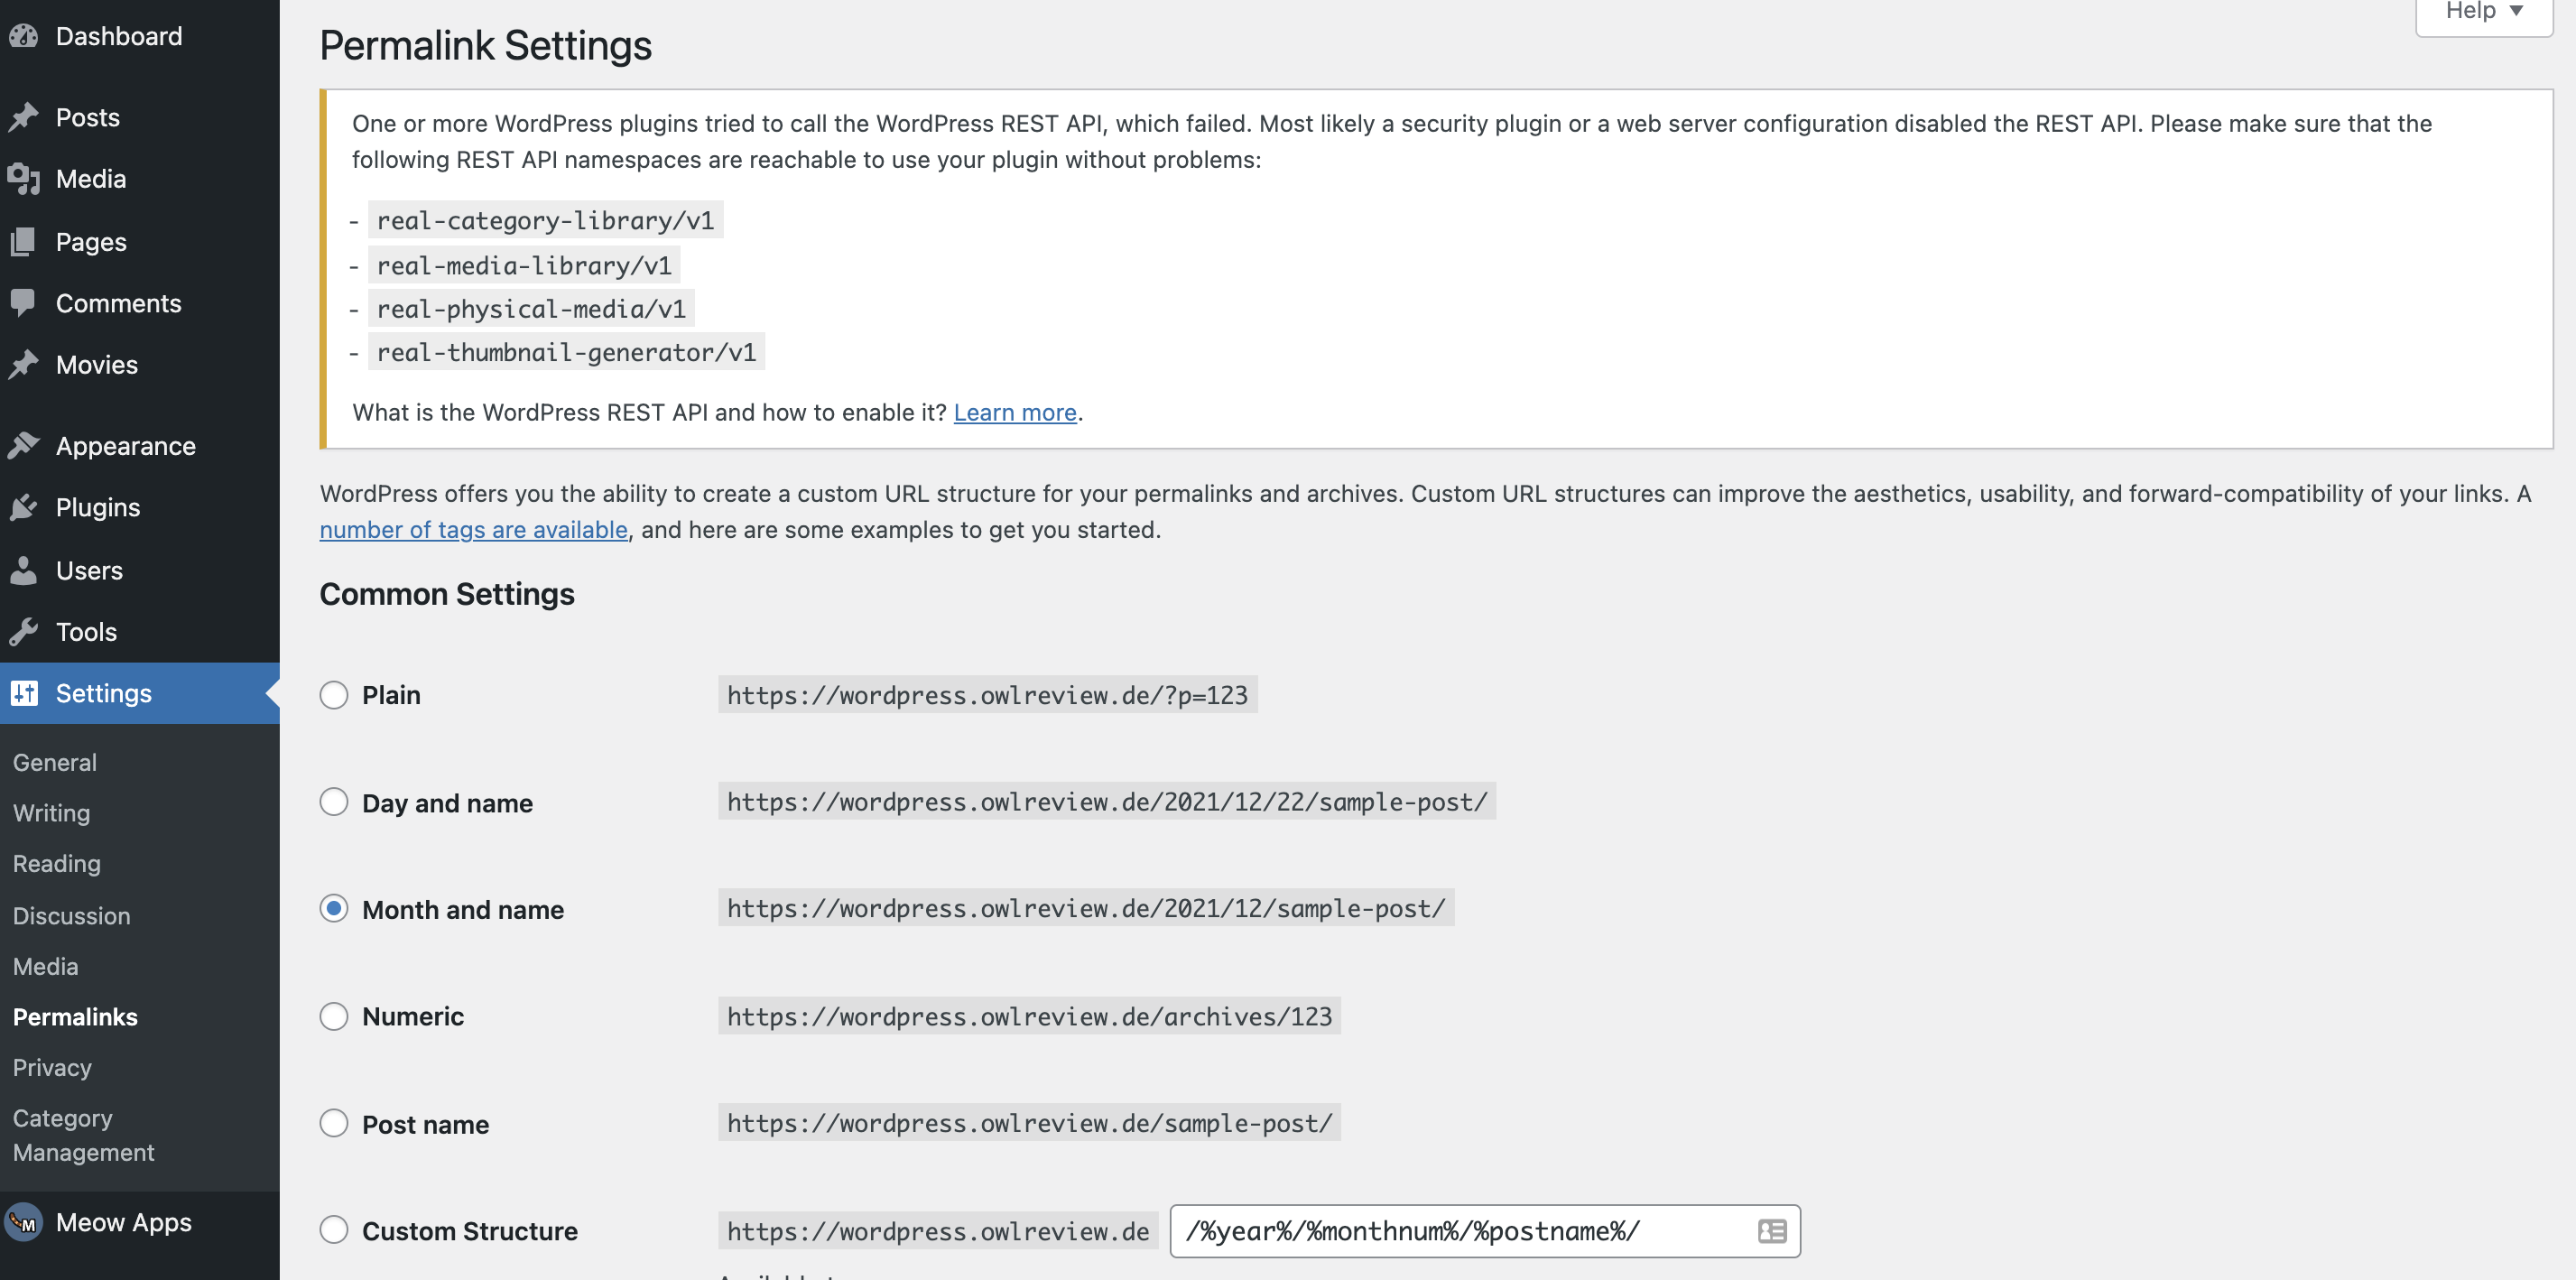
And you’re ready to go. Here you can find different possibilities how your permalinks can be structured.
As already mentioned, the first variant (Plain) is selected by default. We have already explained why this is not optimal. Recommended at this point is Post name, as this structure is the most readable.
Don’t forget to press Save Changes at the very bottom 😉
Rename a single permalink in WordPress
You only want to customise a single permalink? No problem! It’s at least as easy.
Let’s assume that you want to change the permalink of a page and use the Gutenberg editor. Then go to Pages in the menu on the left and click on the relevant page.

Alternatively, the permalink can also be displayed like this:

On the right you will find the entry Permalink. If you open this, you will see the exact name of the permalink for this page and can also edit it in the course of this.
How to set up a redirection
After you have updated a permalink, you should remember to set up a 301 (permanent) redirect.
Why is such a forwarding important? In short: to avoid “dead links”. Such links no longer exist and are therefore anything but useful. After the change, the article should be accessible or retrievable under the new URL – both for your visitors and search engines. This can prevent ranking disadvantages, among other things.
A popular plugin for redirection is Redirection.

After you have installed and activated the redirection plugin, you will find it in the left menu under Tools > Redirection.

The plugin is easy to use. Click on Add New to set up a new redirect. Enter the old URL in the Source URL field and the new URL in the Target URL field.
Example:
- Source URL: /dog-food/
- Target URL: /dog-treats/
Then click on Add Redirect. Et voilà, the new redirection is set up.