
As a website operator, you certainly have a great interest in collecting data about the behaviour of your visitors on your website. This is a great way to optimise your website and start targeted marketing activities.
In the course of this, you have probably already come across tracking using Google Analytics and have perhaps already browsed through one or two instructions on how to set up Google Analytics in your WordPress website. Because in order to obtain the valuable user data, all you need to do is embed the Google Analytics tracking code in your own website. A prerequisite for embedding the tracking code is also finding the tracking ID.
In this article, we will show you in a short tutorial how you can easily find out the tracking ID of your Google Analytics account and integrate the tracking code into your website.
What is the Google Analytics Tracking ID and what is it good for?
Primarily, the tracking ID is used to set up Google Analytics and to be able to integrate it into a website.
In general, the Google Analytics tracking ID is a string which, in the case of universal properties, is structured as follows: UA-XXXXXX-X. The X stands for numbers. The tracking ID is contained in the corresponding tracking code. Thus, it can be assigned to which property and to which account collected data should be sent.
The tracking code can be used to integrate Google Analytics into a website.
Where can I find my Google tracking ID?
This is how you can find your tracking ID in your Google Analytics account:
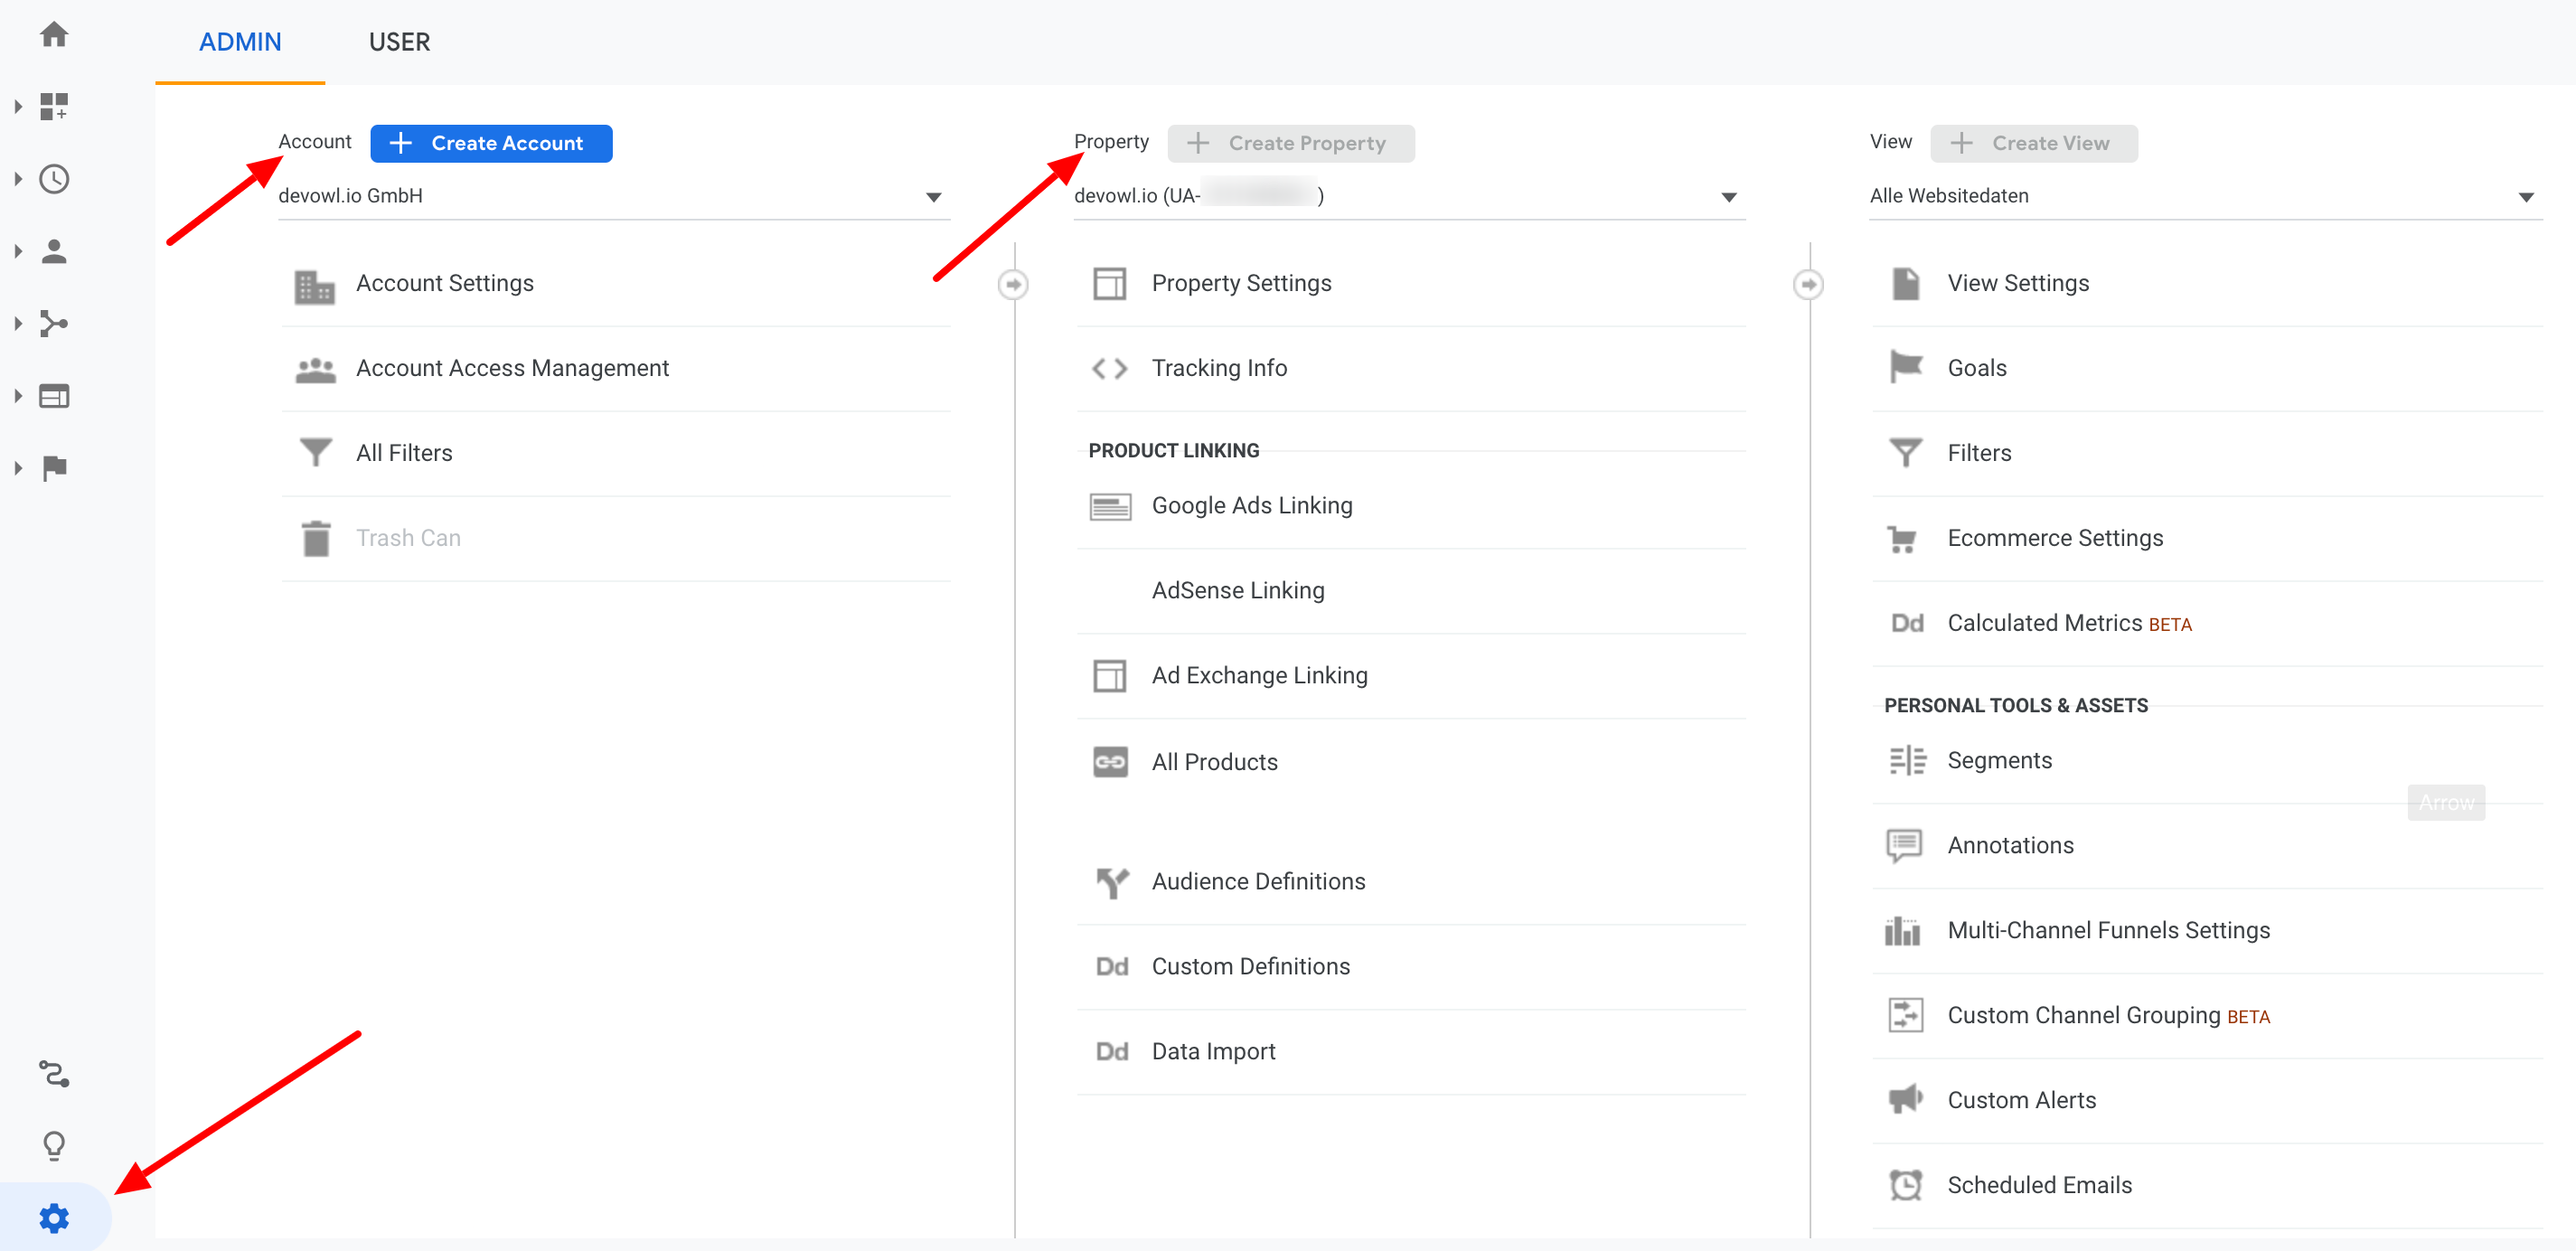
- Go to the admin area by clicking on the cogwheel at the bottom left.
- Select the correct account in the Account column. In the Property column, select your correct property (website to be tracked).
- In the Property column, click Tracking Info > Tracking Code. Here you will find the code according to the pattern
UA-XXXXXXXX-X. - Directly under your ID, you will find your tracking code in Website Tracking. This does not refer to the entire Google Analytics account, but only to the selected property.
👉 You can integrate the tracking code via
- A Google Analytics plugin,
- Google Tag Manager
- or direct embedding in the source code of the website.
You should only ever embed the code once in a website, otherwise you run the risk of collecting data twice.
How exactly you apply the last two methods to add your tracking code to your website, we will show you later in the article.
In our article on the GDPR-compliant integration of MonsterInisghts, we show you what you need to bear in mind when using a Google Analytics plugin such as MonsterInsights.
Where can I find my Measurement ID?
The measurement ID is more or less the same as the tracking ID for the new Google Analytics 4. If you use a Google Analytics 4 property, your UA ID becomes a G ID (“Measurement” ID; also called measurement ID). However, finding this is easy. To do this, go to the property column of your Analytics interfaces – as with the tracking ID. After you have selected the correct property, click on Data Streams. Select the correct string. At the top right you will now find the “G” ID. The ID is displayed in the pattern G-XXXXXXX.
Embed tracking code in the website
For the sake of completeness, you should include the tracking code in every sub-page of your website. Therefore, it is a good idea to see if you can insert a one-time HTML code on your website that is automatically displayed on each sub-page.
- Open analytics.google.com
- Go to the admin area by clicking on the cogwheel at the bottom left.
- Select the correct account in the Account column. In the Property column, select your correct property (website to be tracked).
- In the Property column, click Tracking Info > Tracking Code.
- Copy the code you find in the Website Tracking field.
- You can now insert this code into the HTML of your website. Ideally, you should insert it directly into the header after the opening
<head>element.<head>Tracking code</head>
Integrate tracking code using Google Tag Manager
Another way to add the tracking code to a website is to integrate it via Google Tag Manager. One advantage here is that the code does not have to be entered manually into each individual sub-page and changed if necessary. Also, you will find it easier if you have no programming skills. Changes can be made directly in the Google Tag Manager interface.
Use case 1: Google Analytics Universal Analytics
- We assume that you have already created an account and created a container in it.
- Select your container.
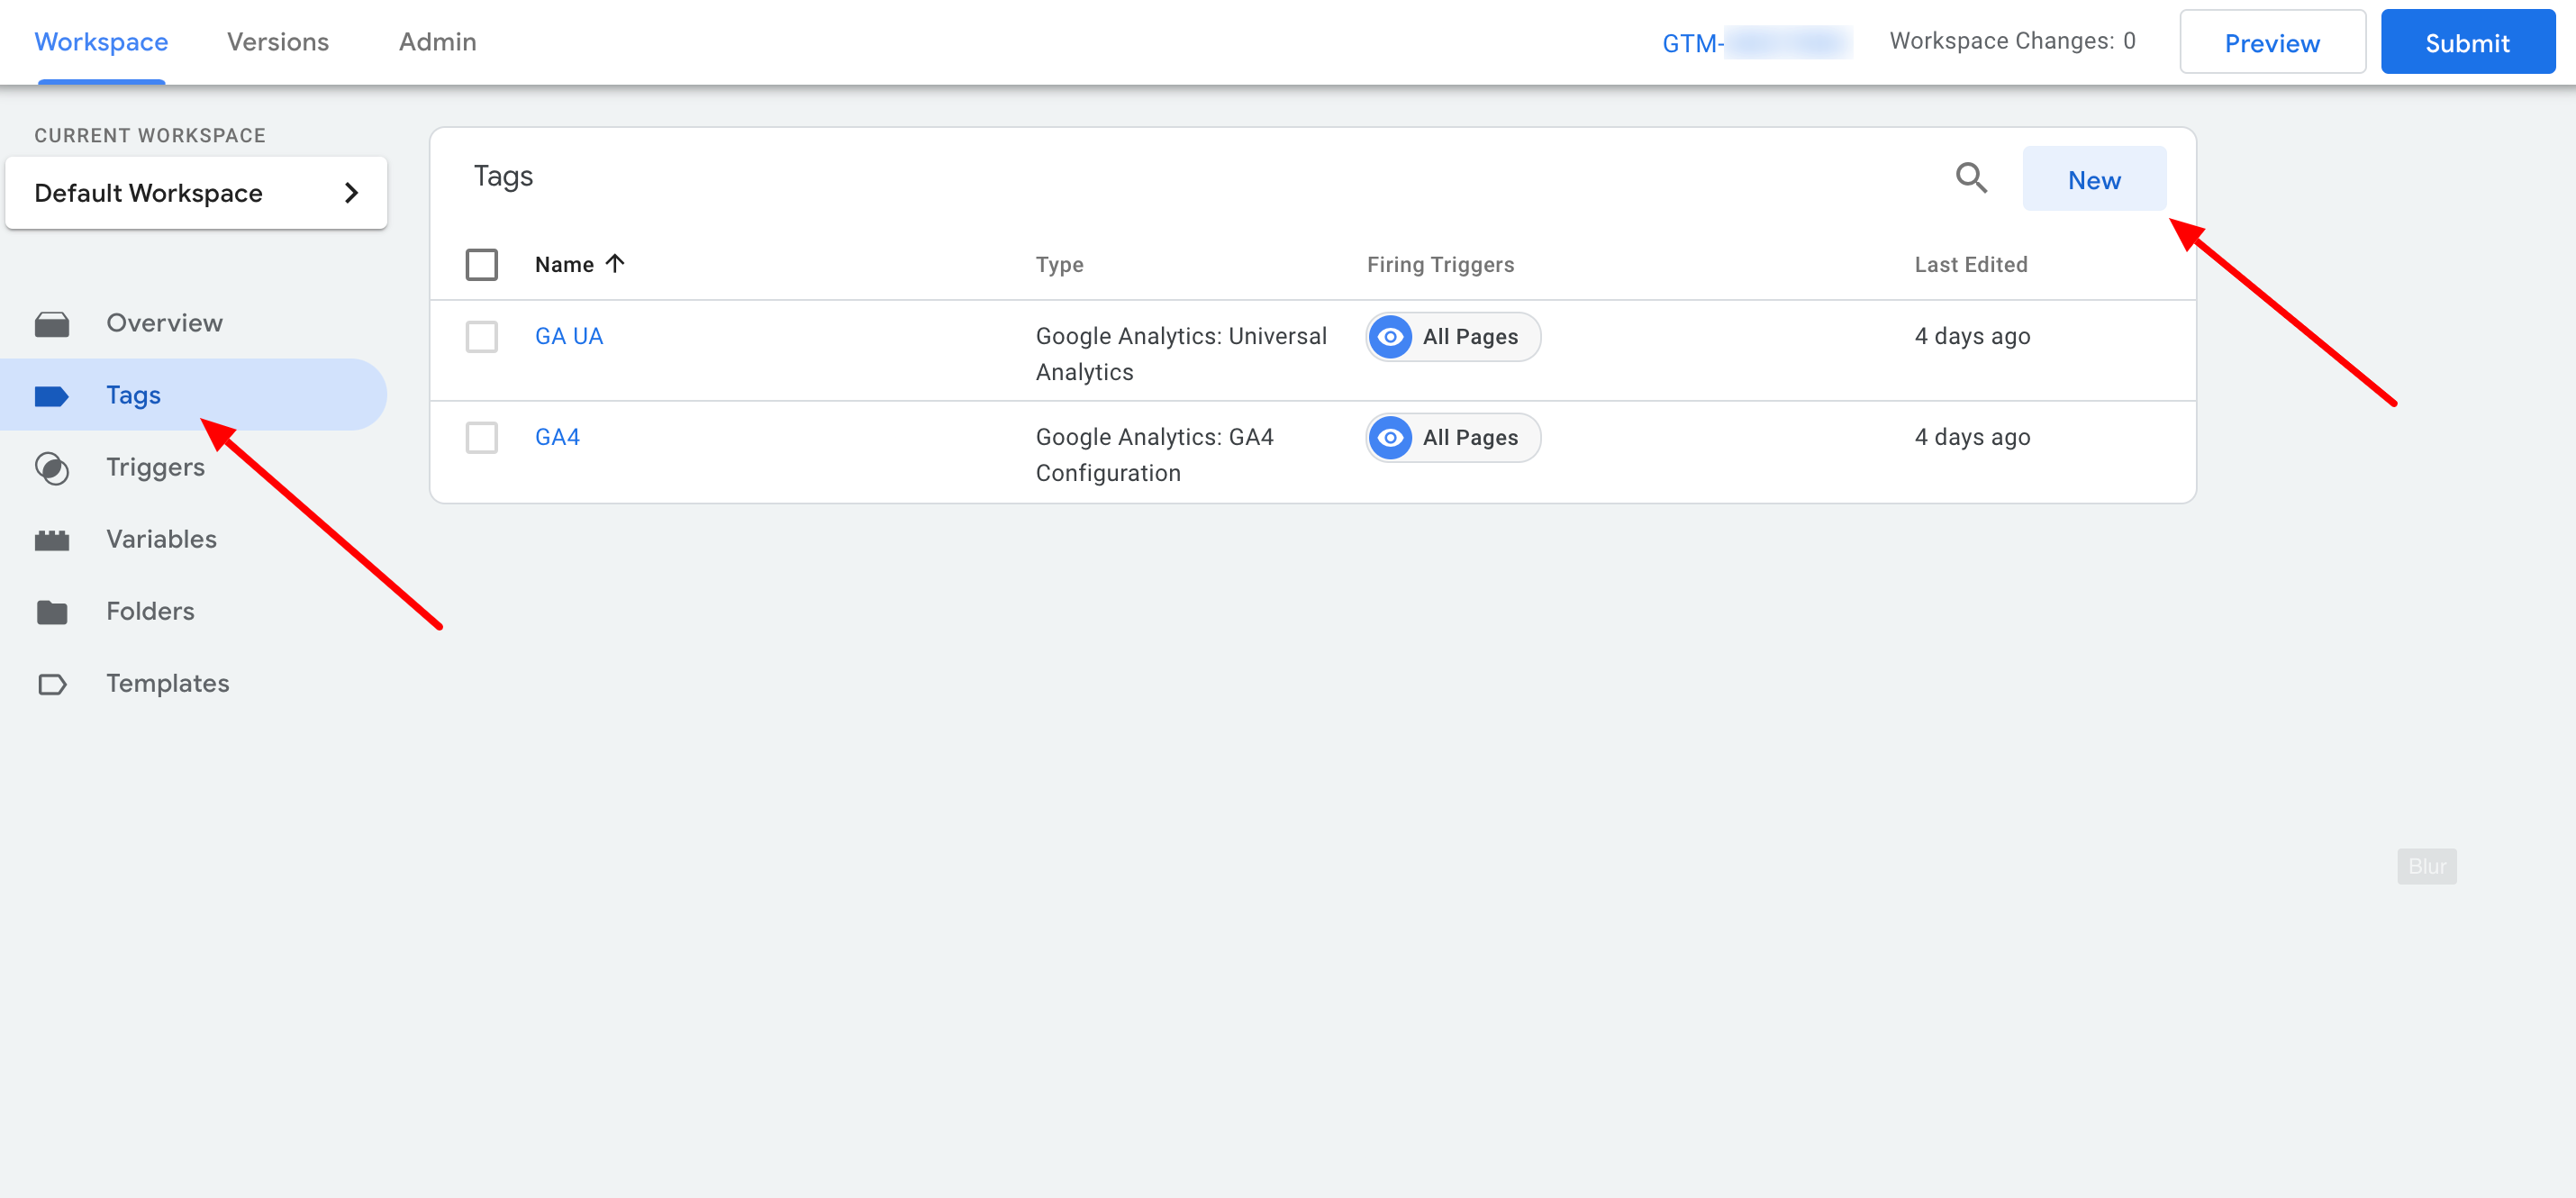
- Click on Tags in the menu bar on the left. Tags are the core in Google Tag Manager (who would have thought it 😉).
- Click on New.
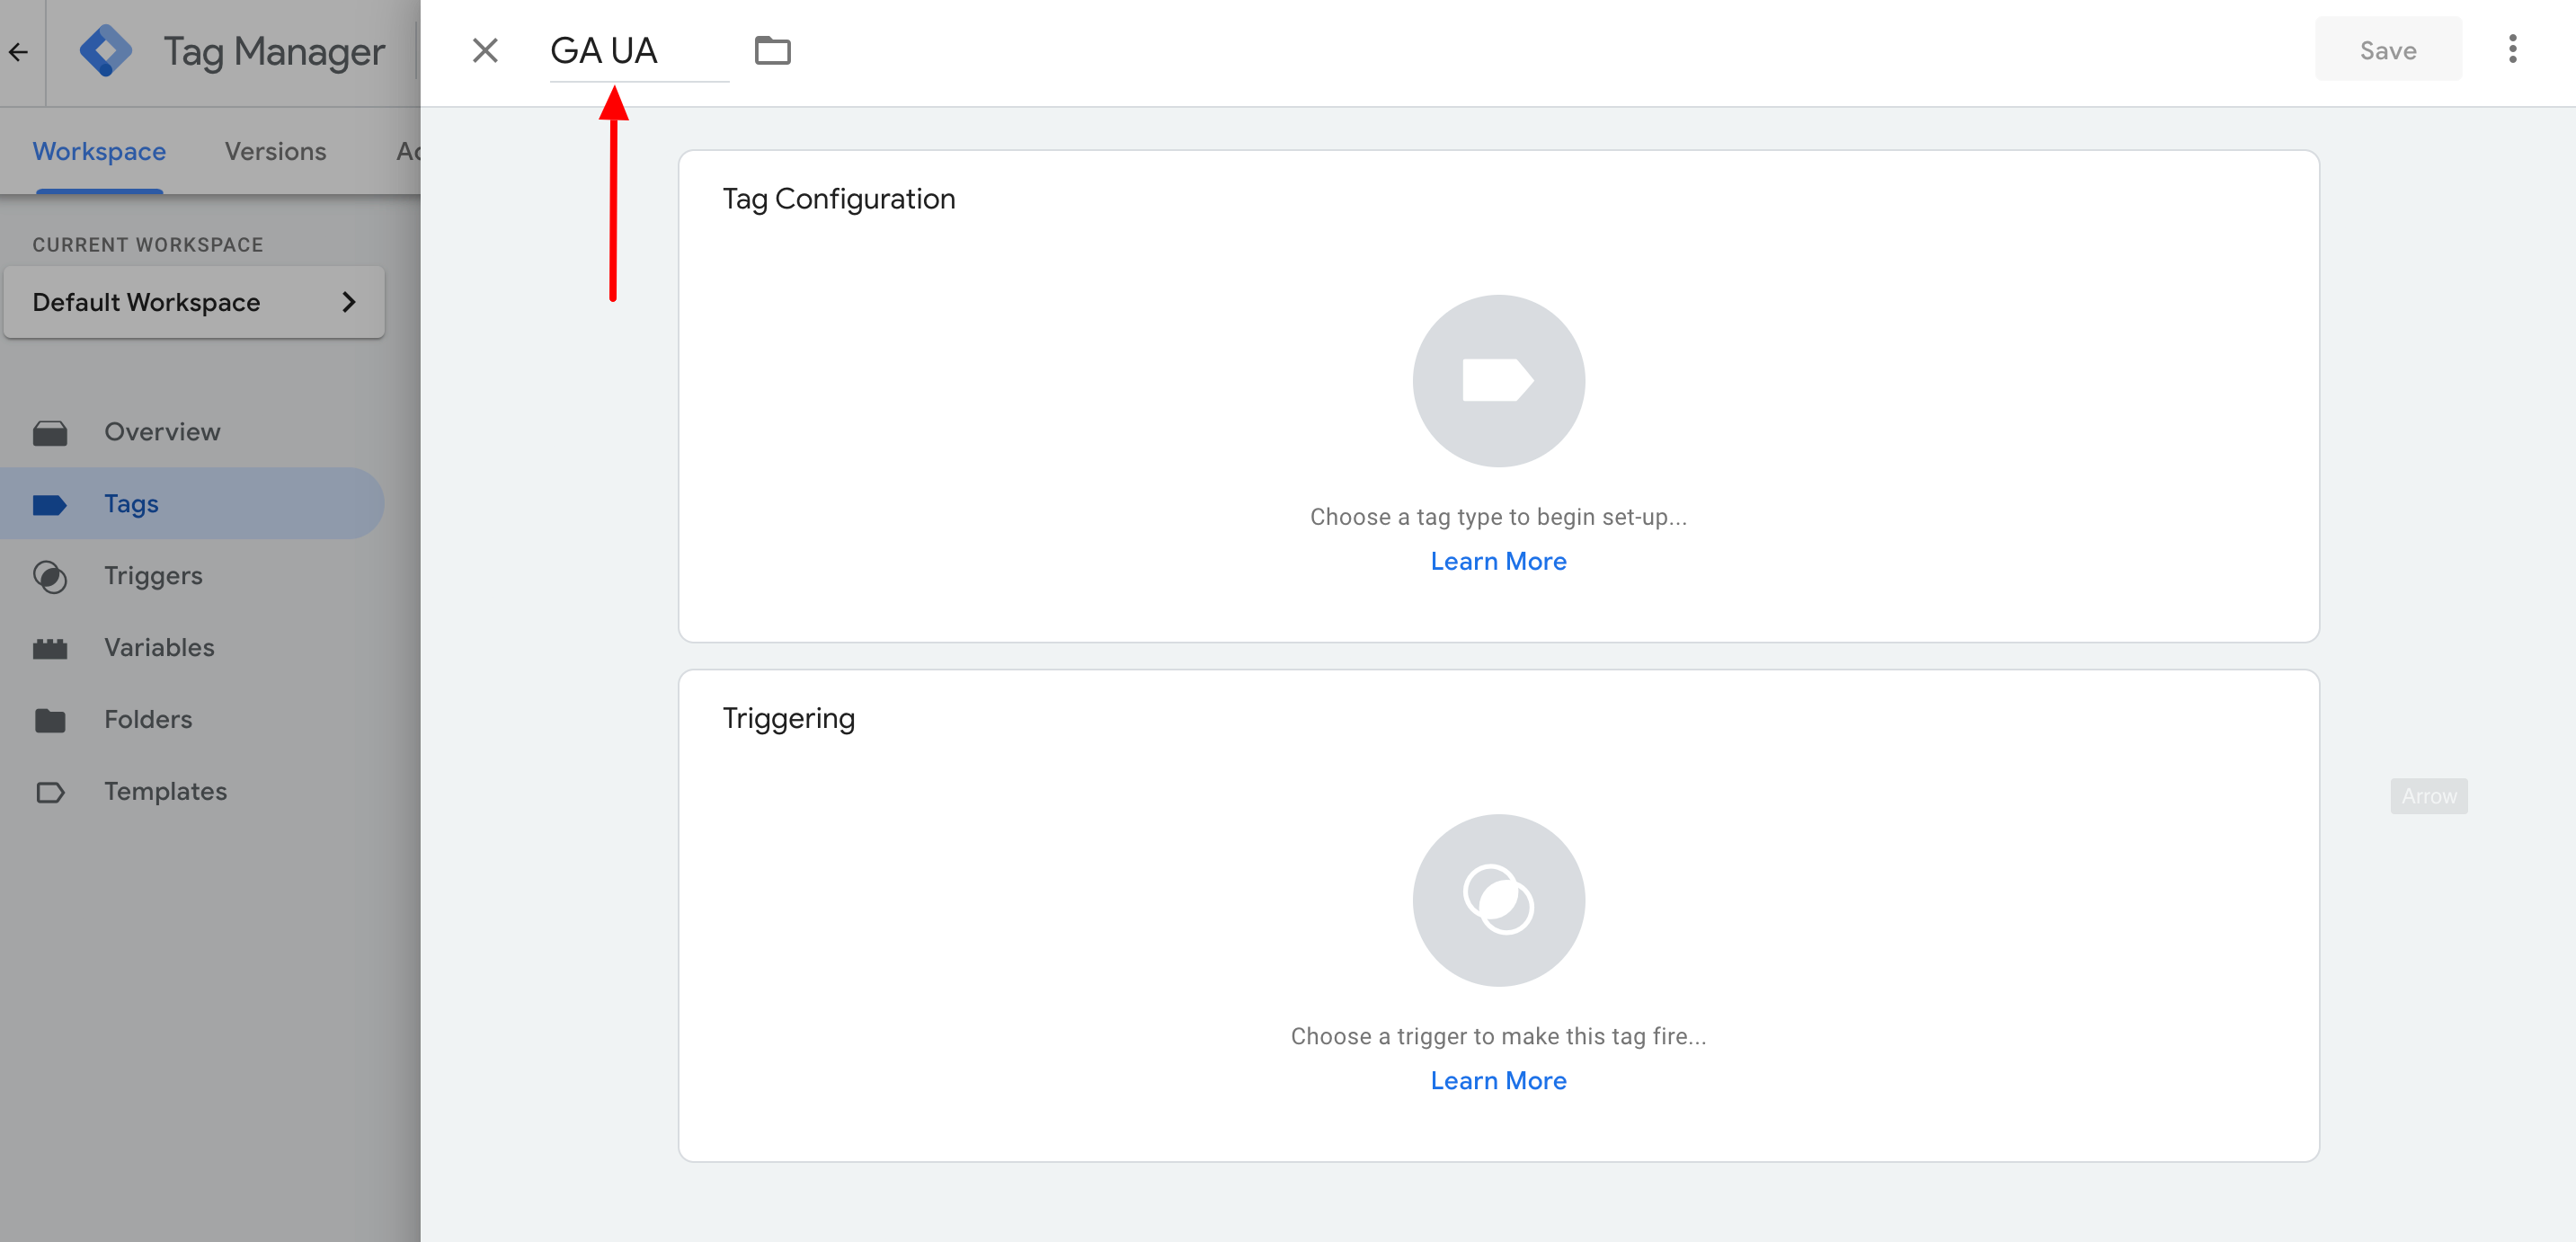
- Name your tag. In our example, we called it GA UA (Google Analytics Universal Analytics).
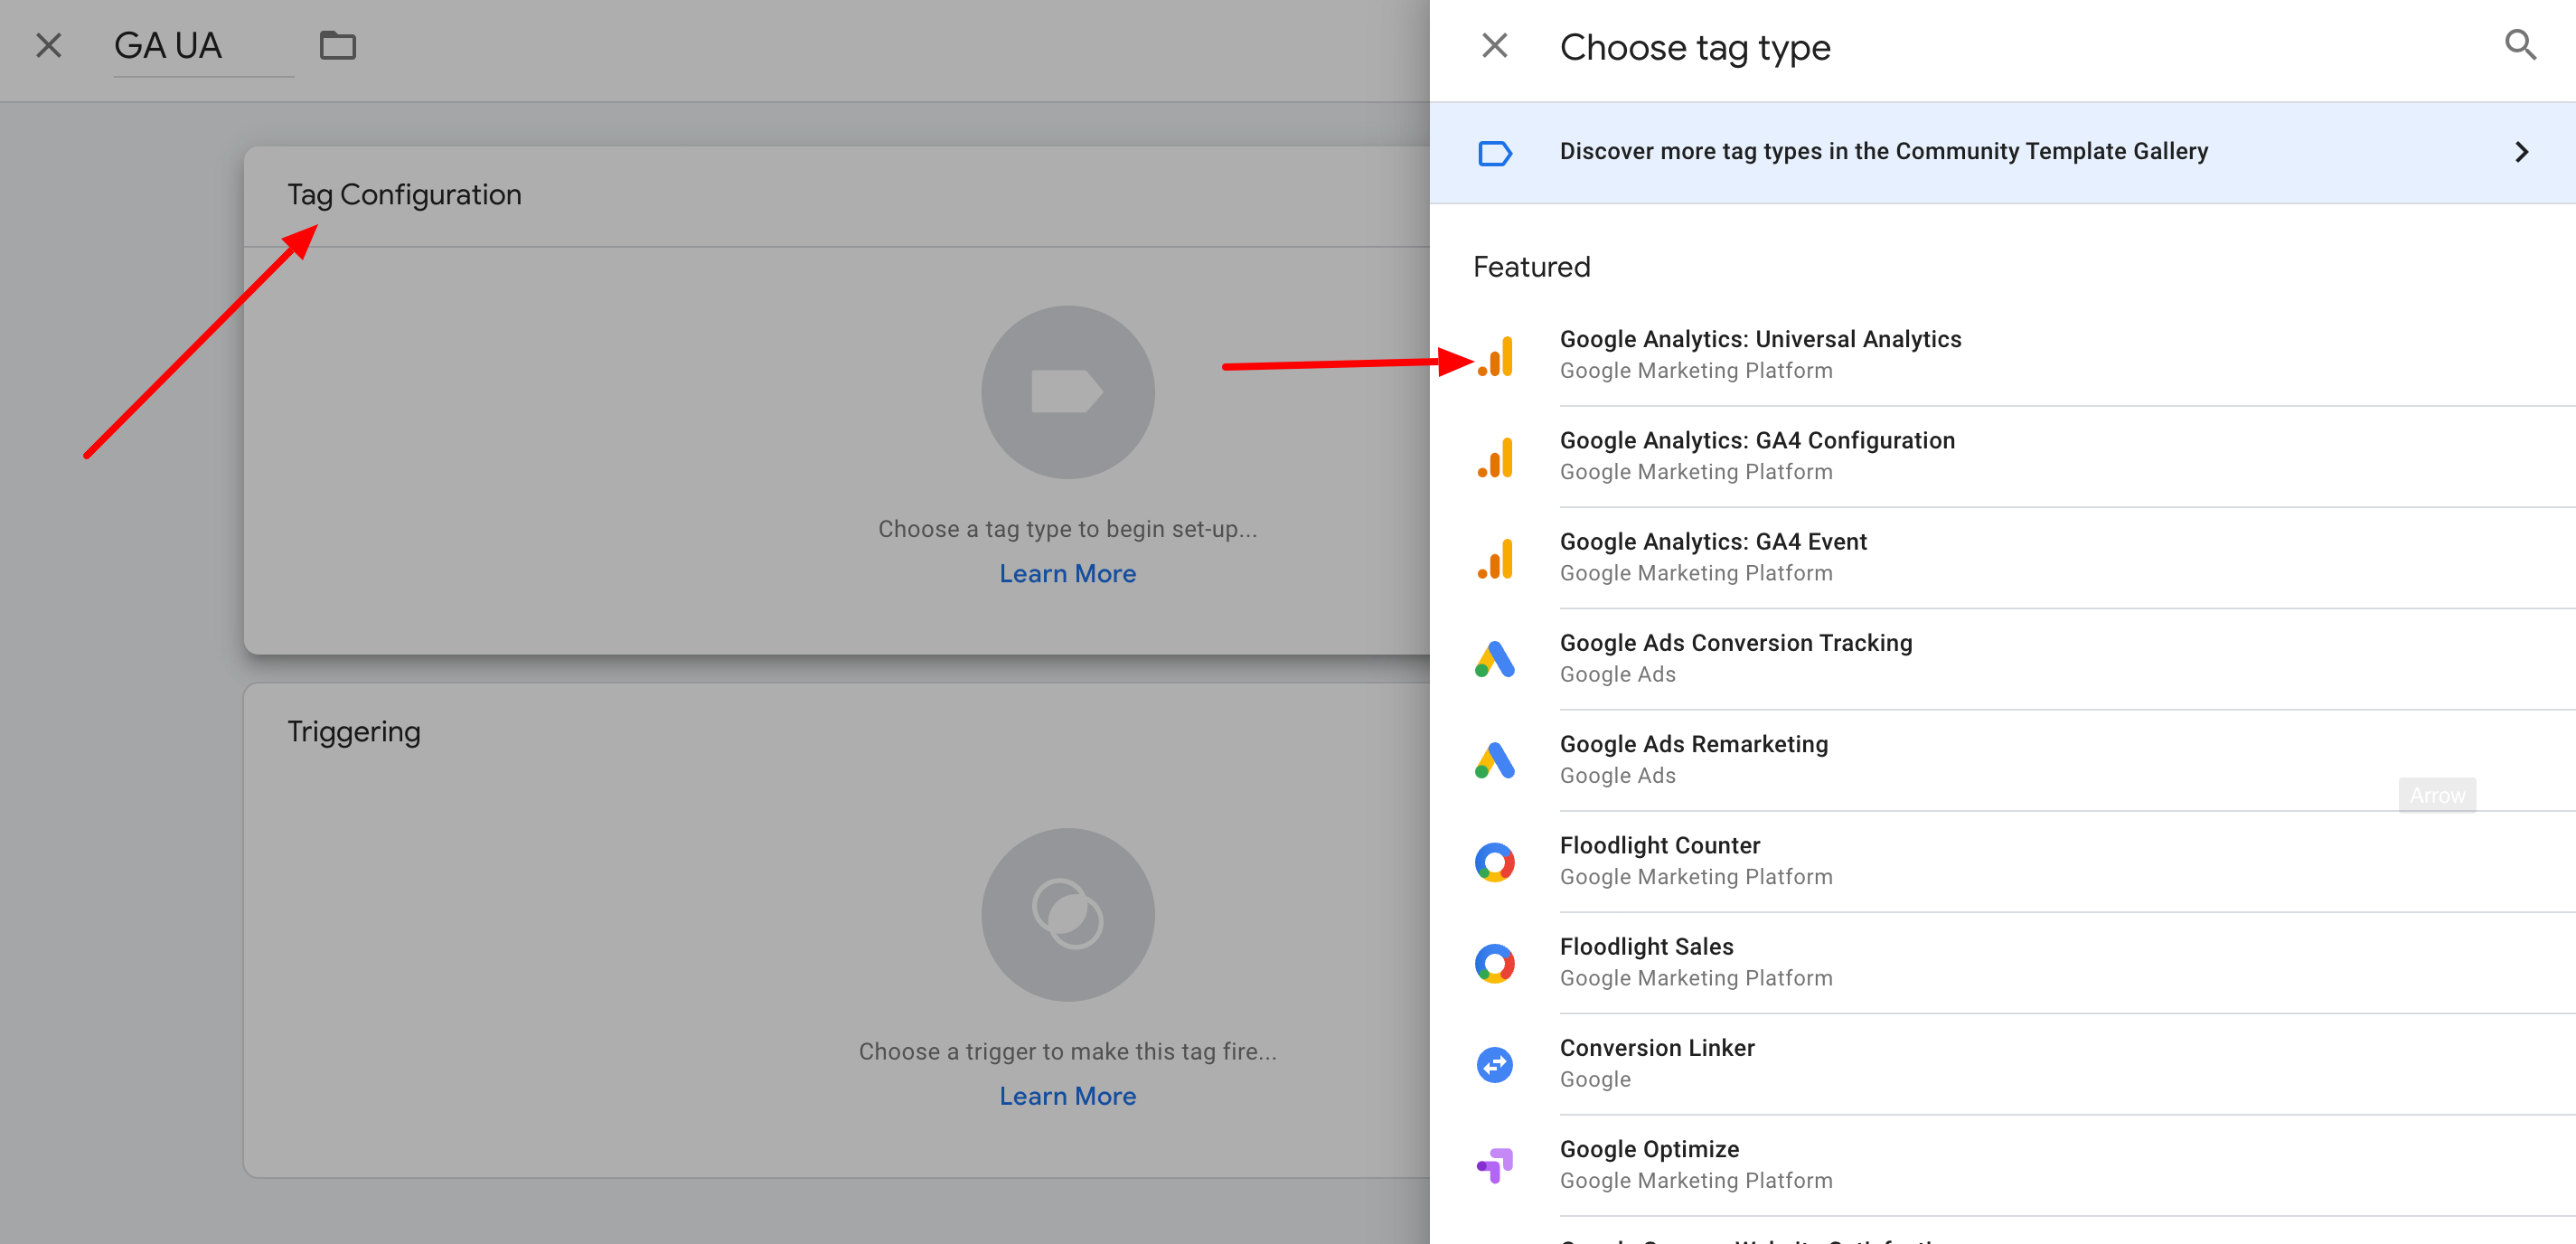
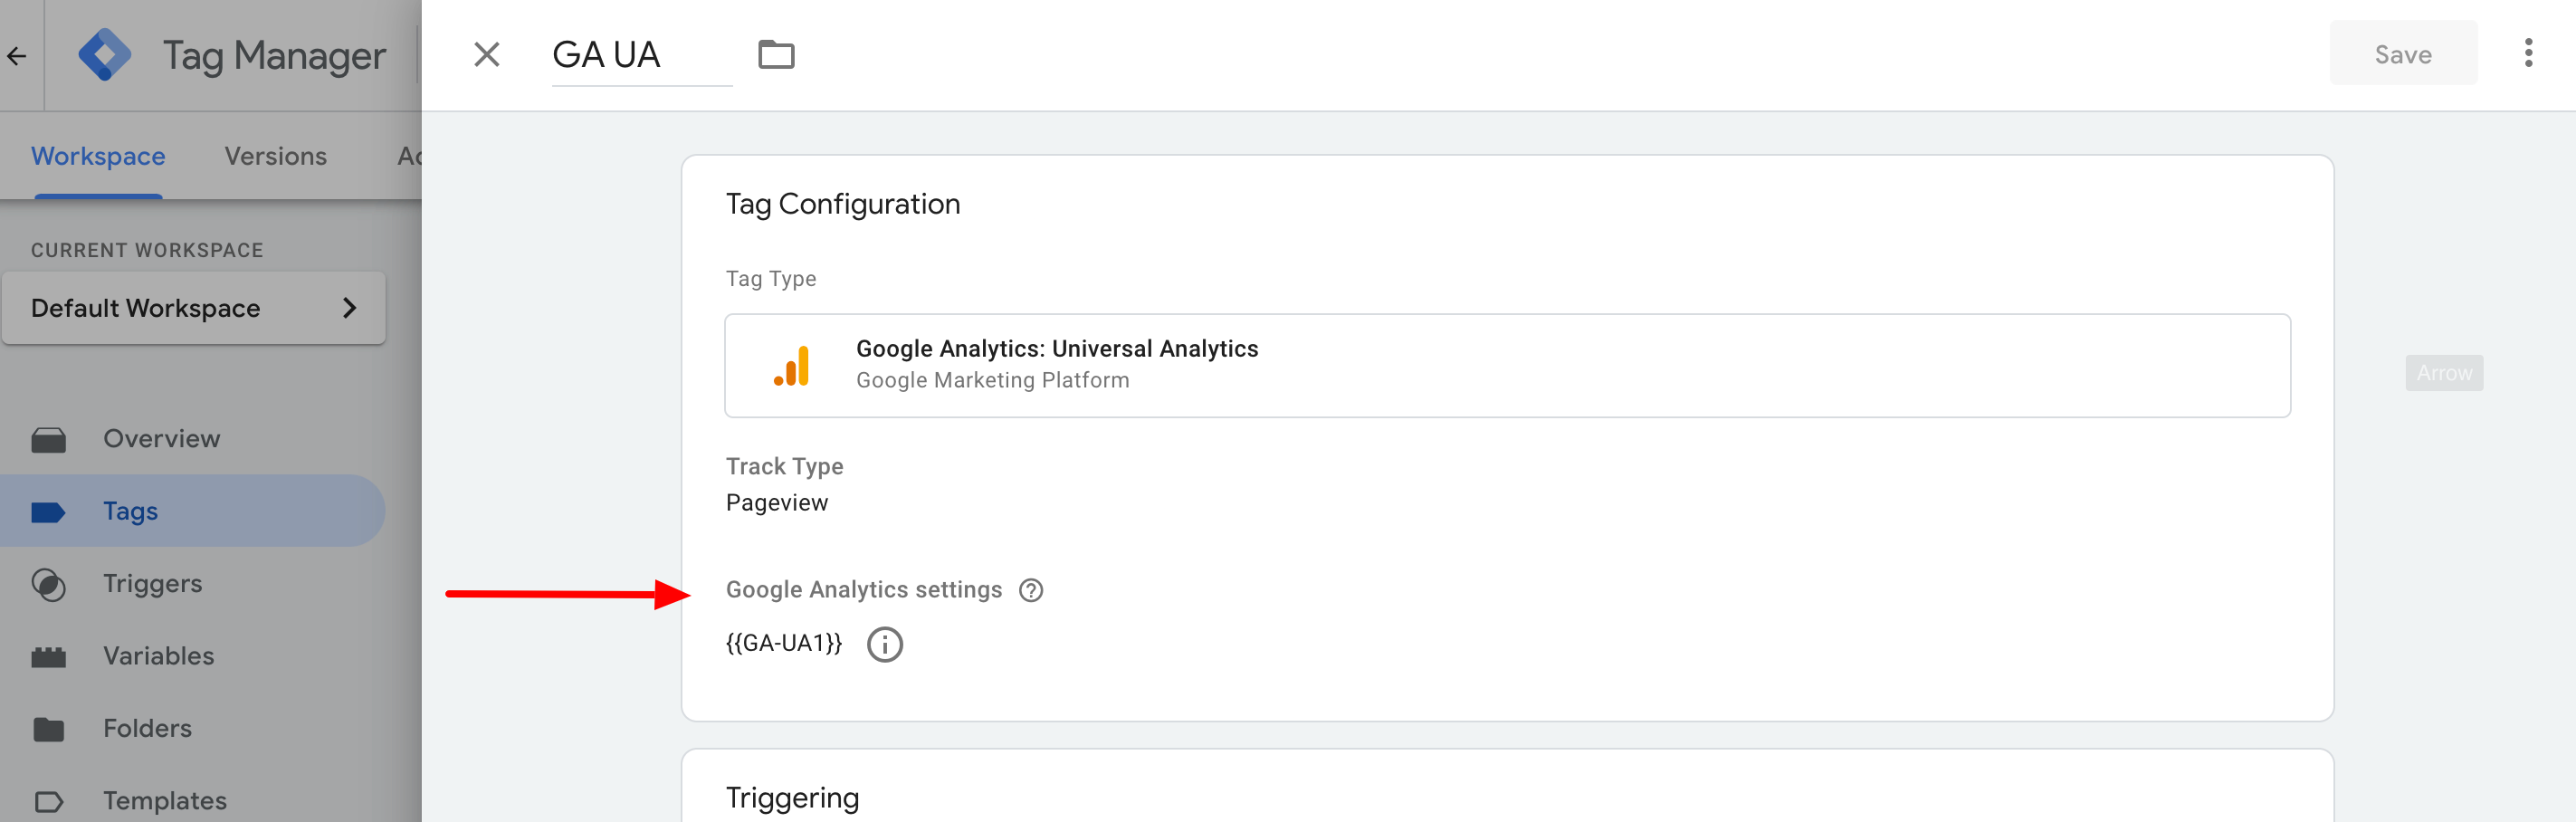
- Click on Tag Configuration.
- Select the desired integration from the list of numerous integrations and services. In our example, we select Google Analytics: Universal Analytics.
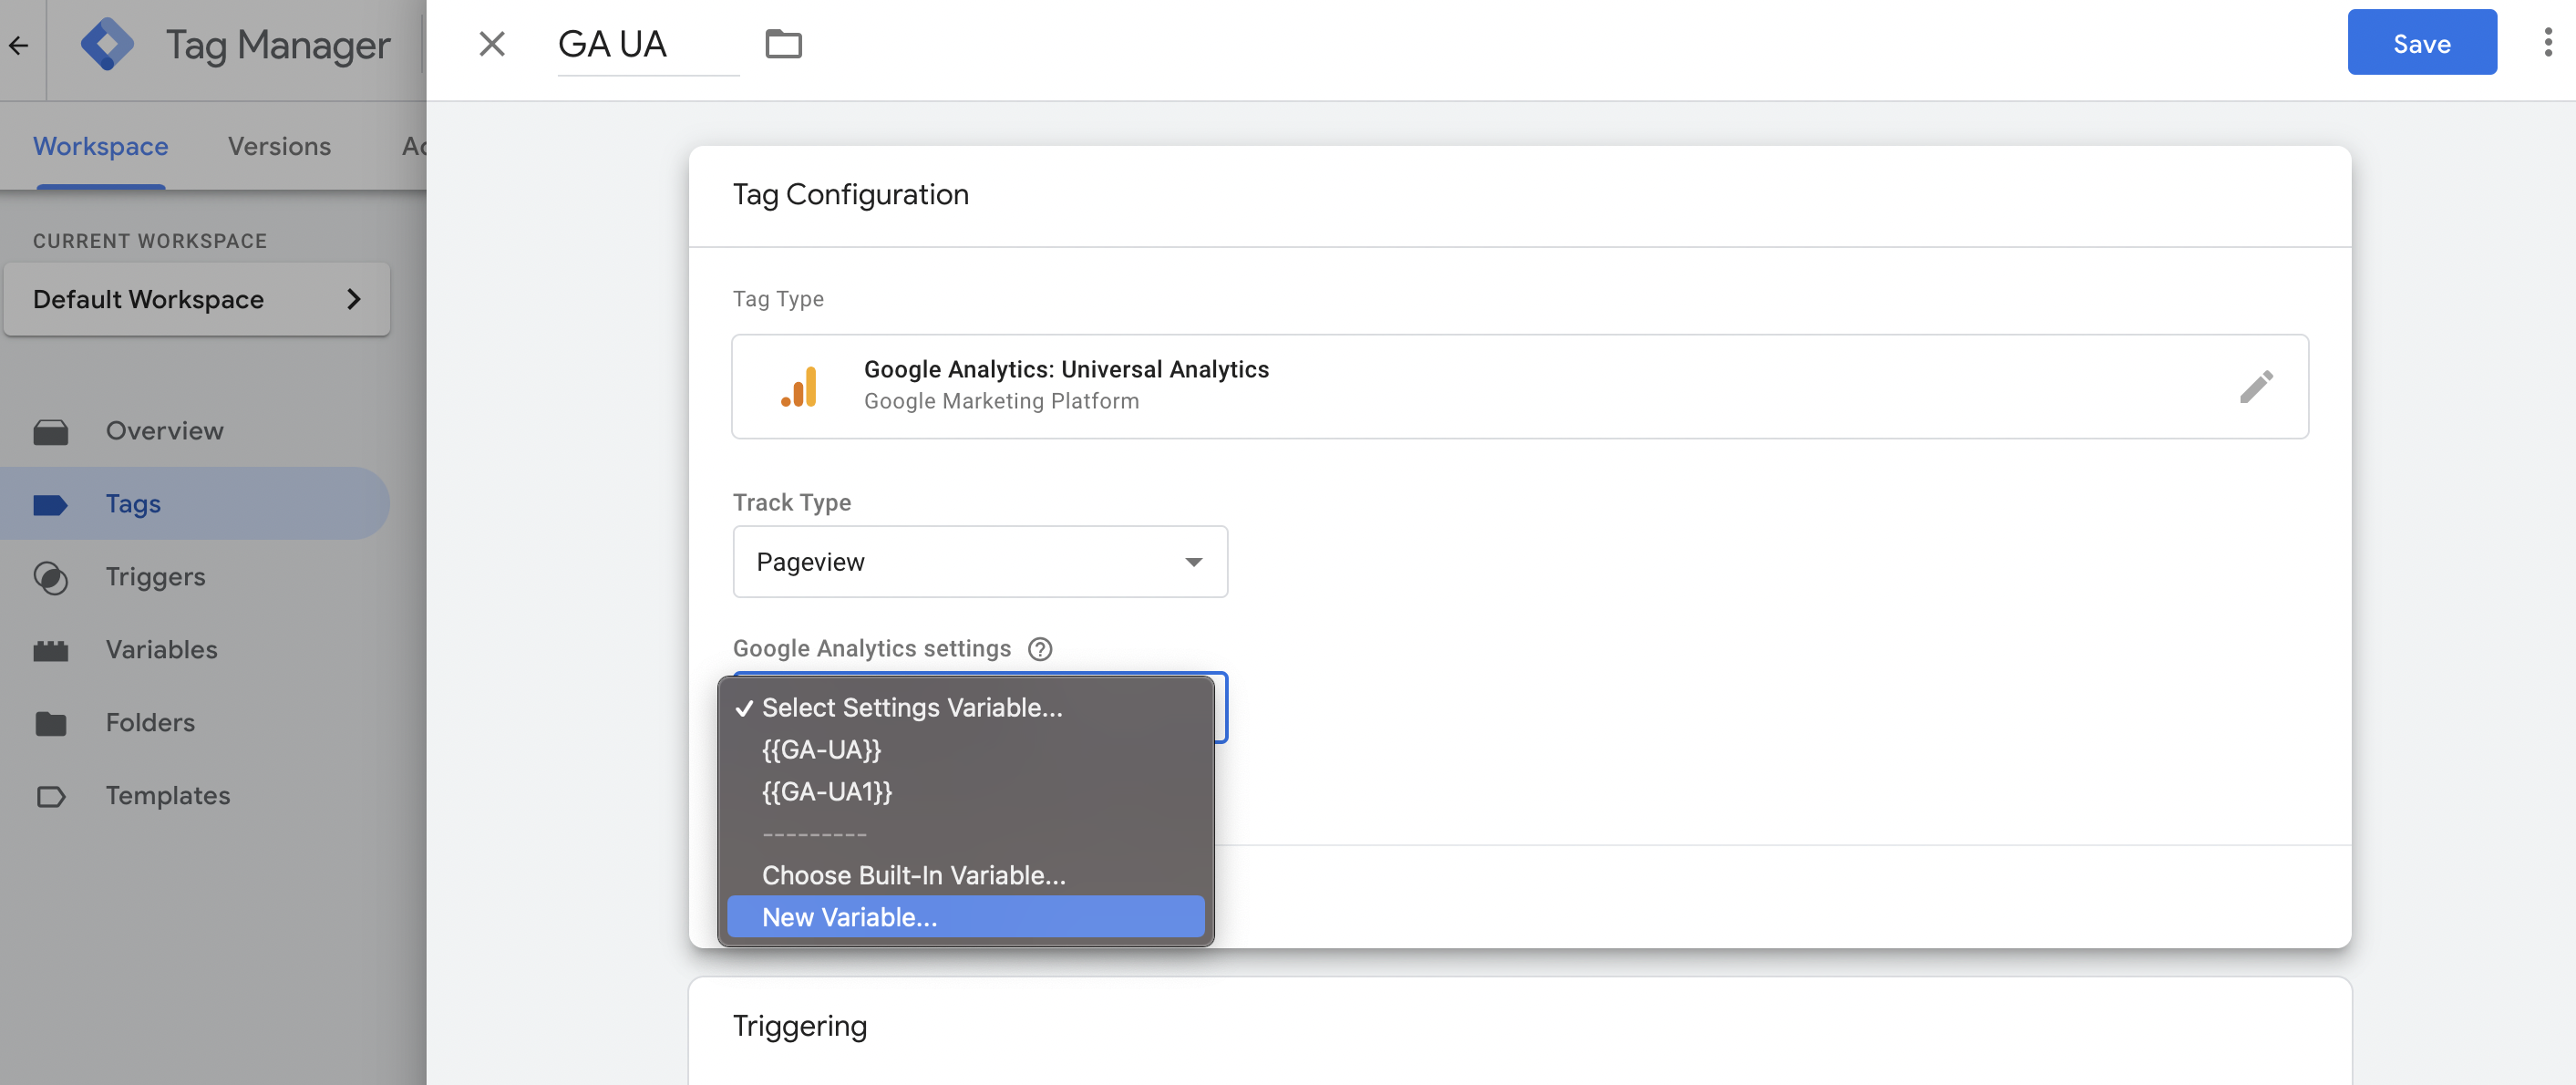
- Track Type: Here you can select what should be tracked and when.
- Google Analytics settings: Here you specify where and how which data should be stored.
- Select New Variable… from the list.
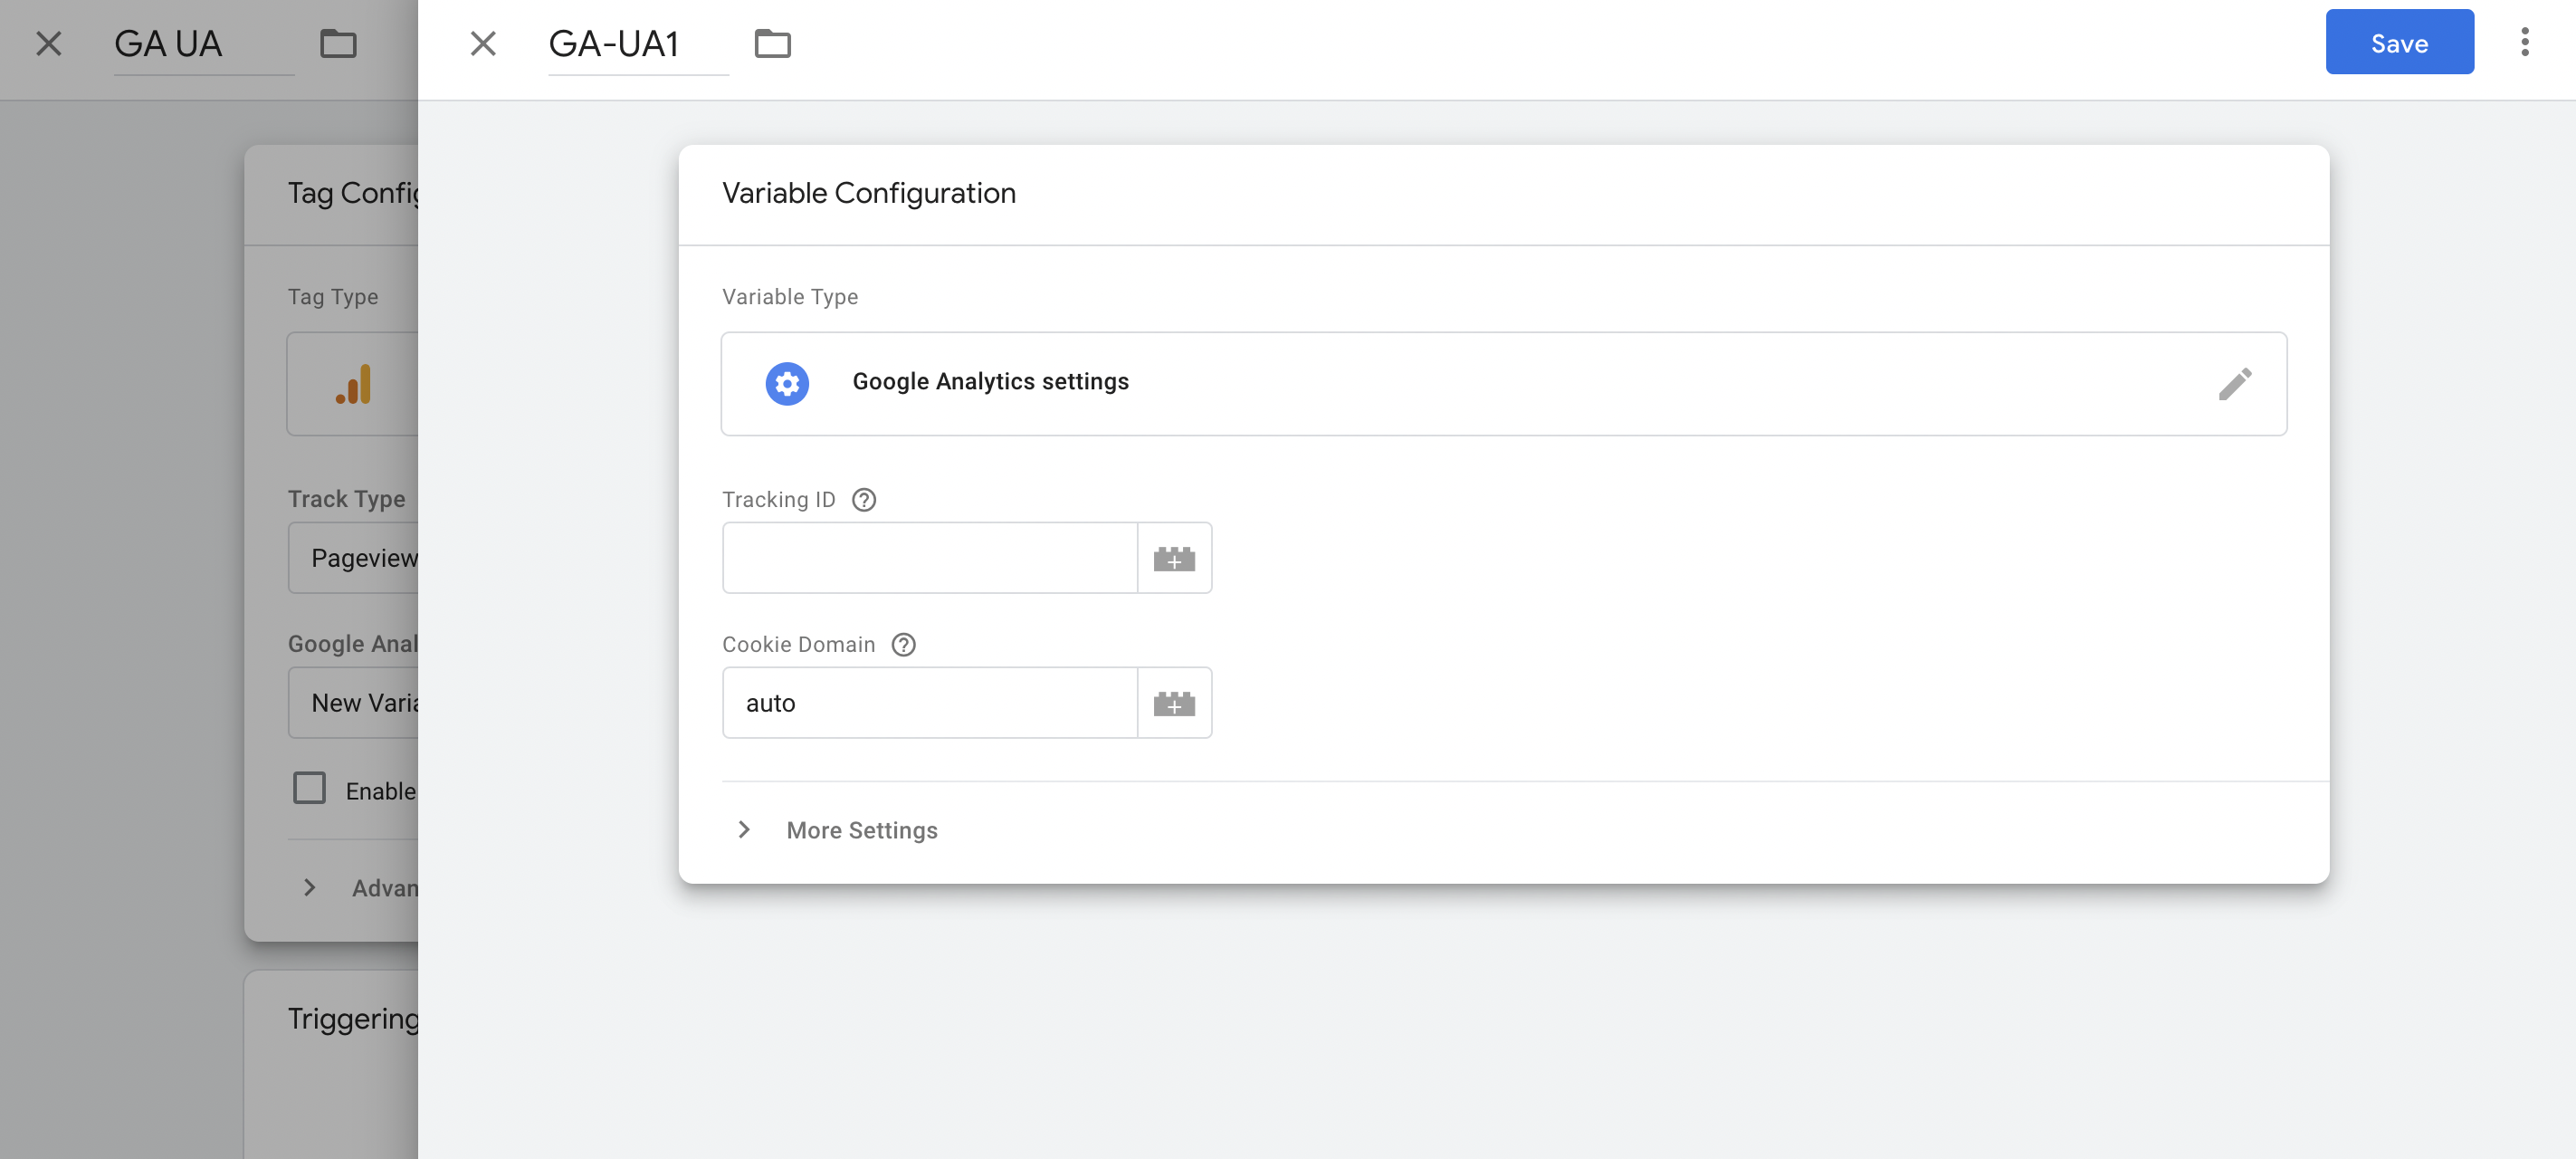
- Give your variable a name.
- Click on Variable Configuration.
- We start with Tracking ID. The tracking ID is the ID of the Google Analytics property. We have already shown you how to find this out in the first part of the article.
- Copy the tracking ID and paste it back into your Google Tag Manager tab.
- Paste the copied ID into the Tracking ID field.
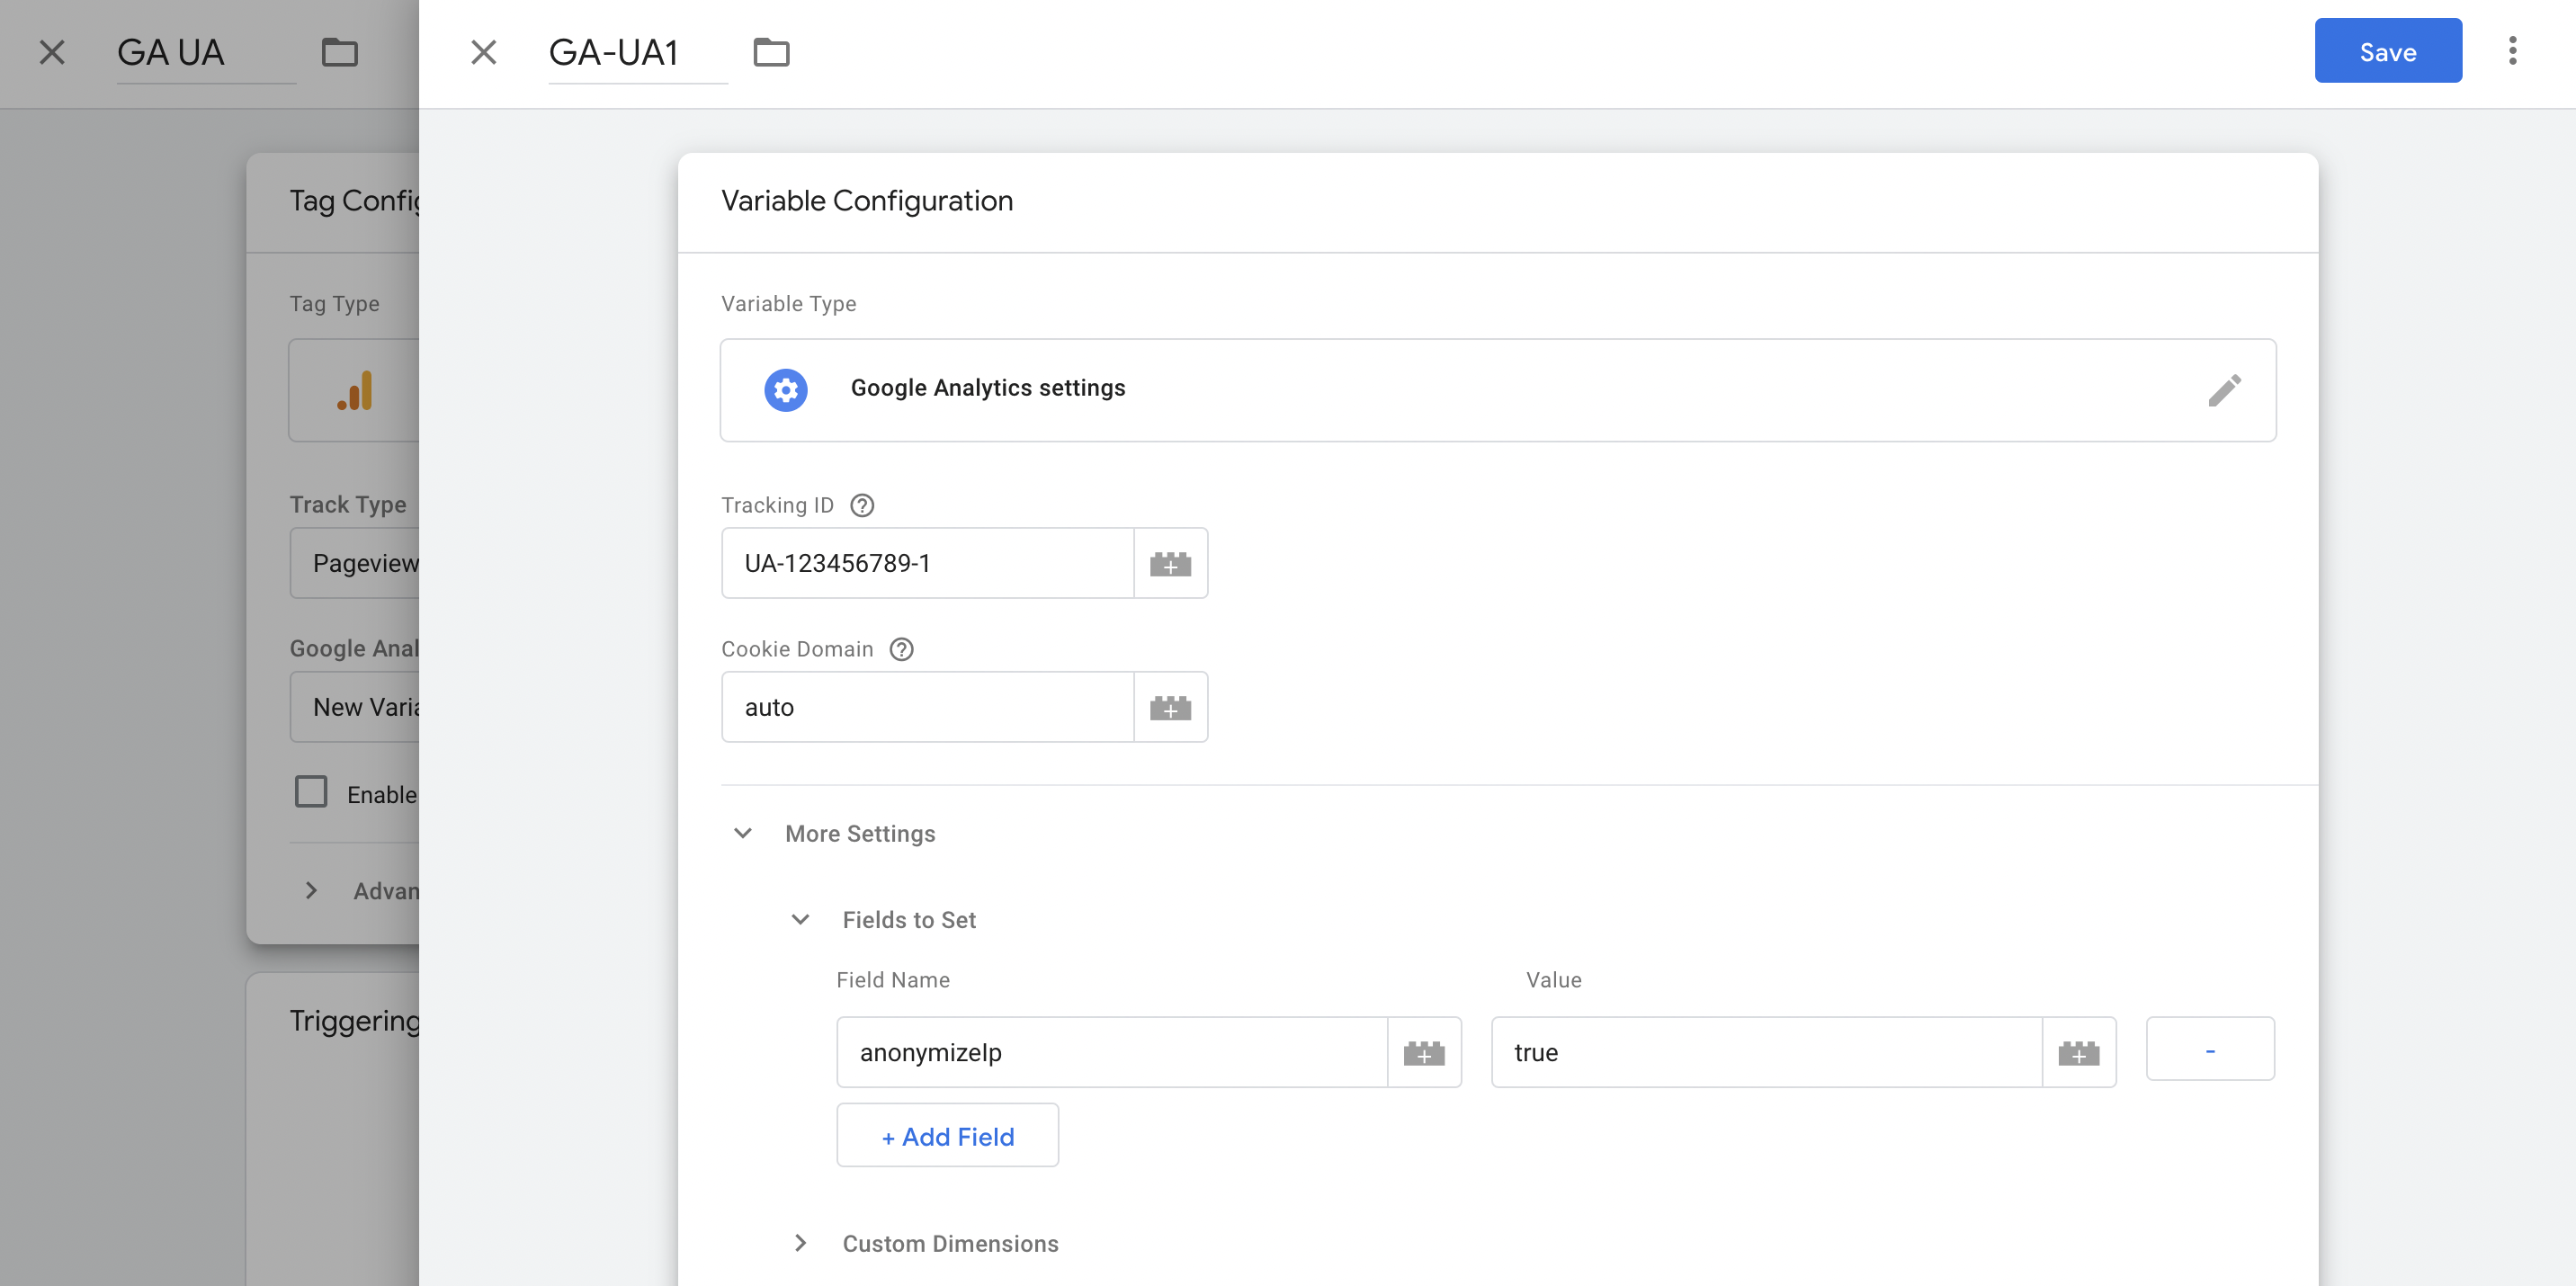
Important: In order to embed Google Analytics in your website in a more privacy-friendly way, you must ensure that the IP addresses of your visitors are anonymised, as the IP address is considered personal data in some countries according to the GDPR. Therefore, we now create and embed an anonymize-ip tag.
- Click More Settings > Fields to Set > + Add Field.
- Enter
anonymizeIPin the field Field Name. - Enter
truein the Value field. This causes the IP addresses to be anonymised when the data is saved in Google Analytics and Universal Analytics. - Click on the blue Save button in the top right-hand corner.
- Now Google Analytics: Universal Analytics is integrated on the website with these settings.
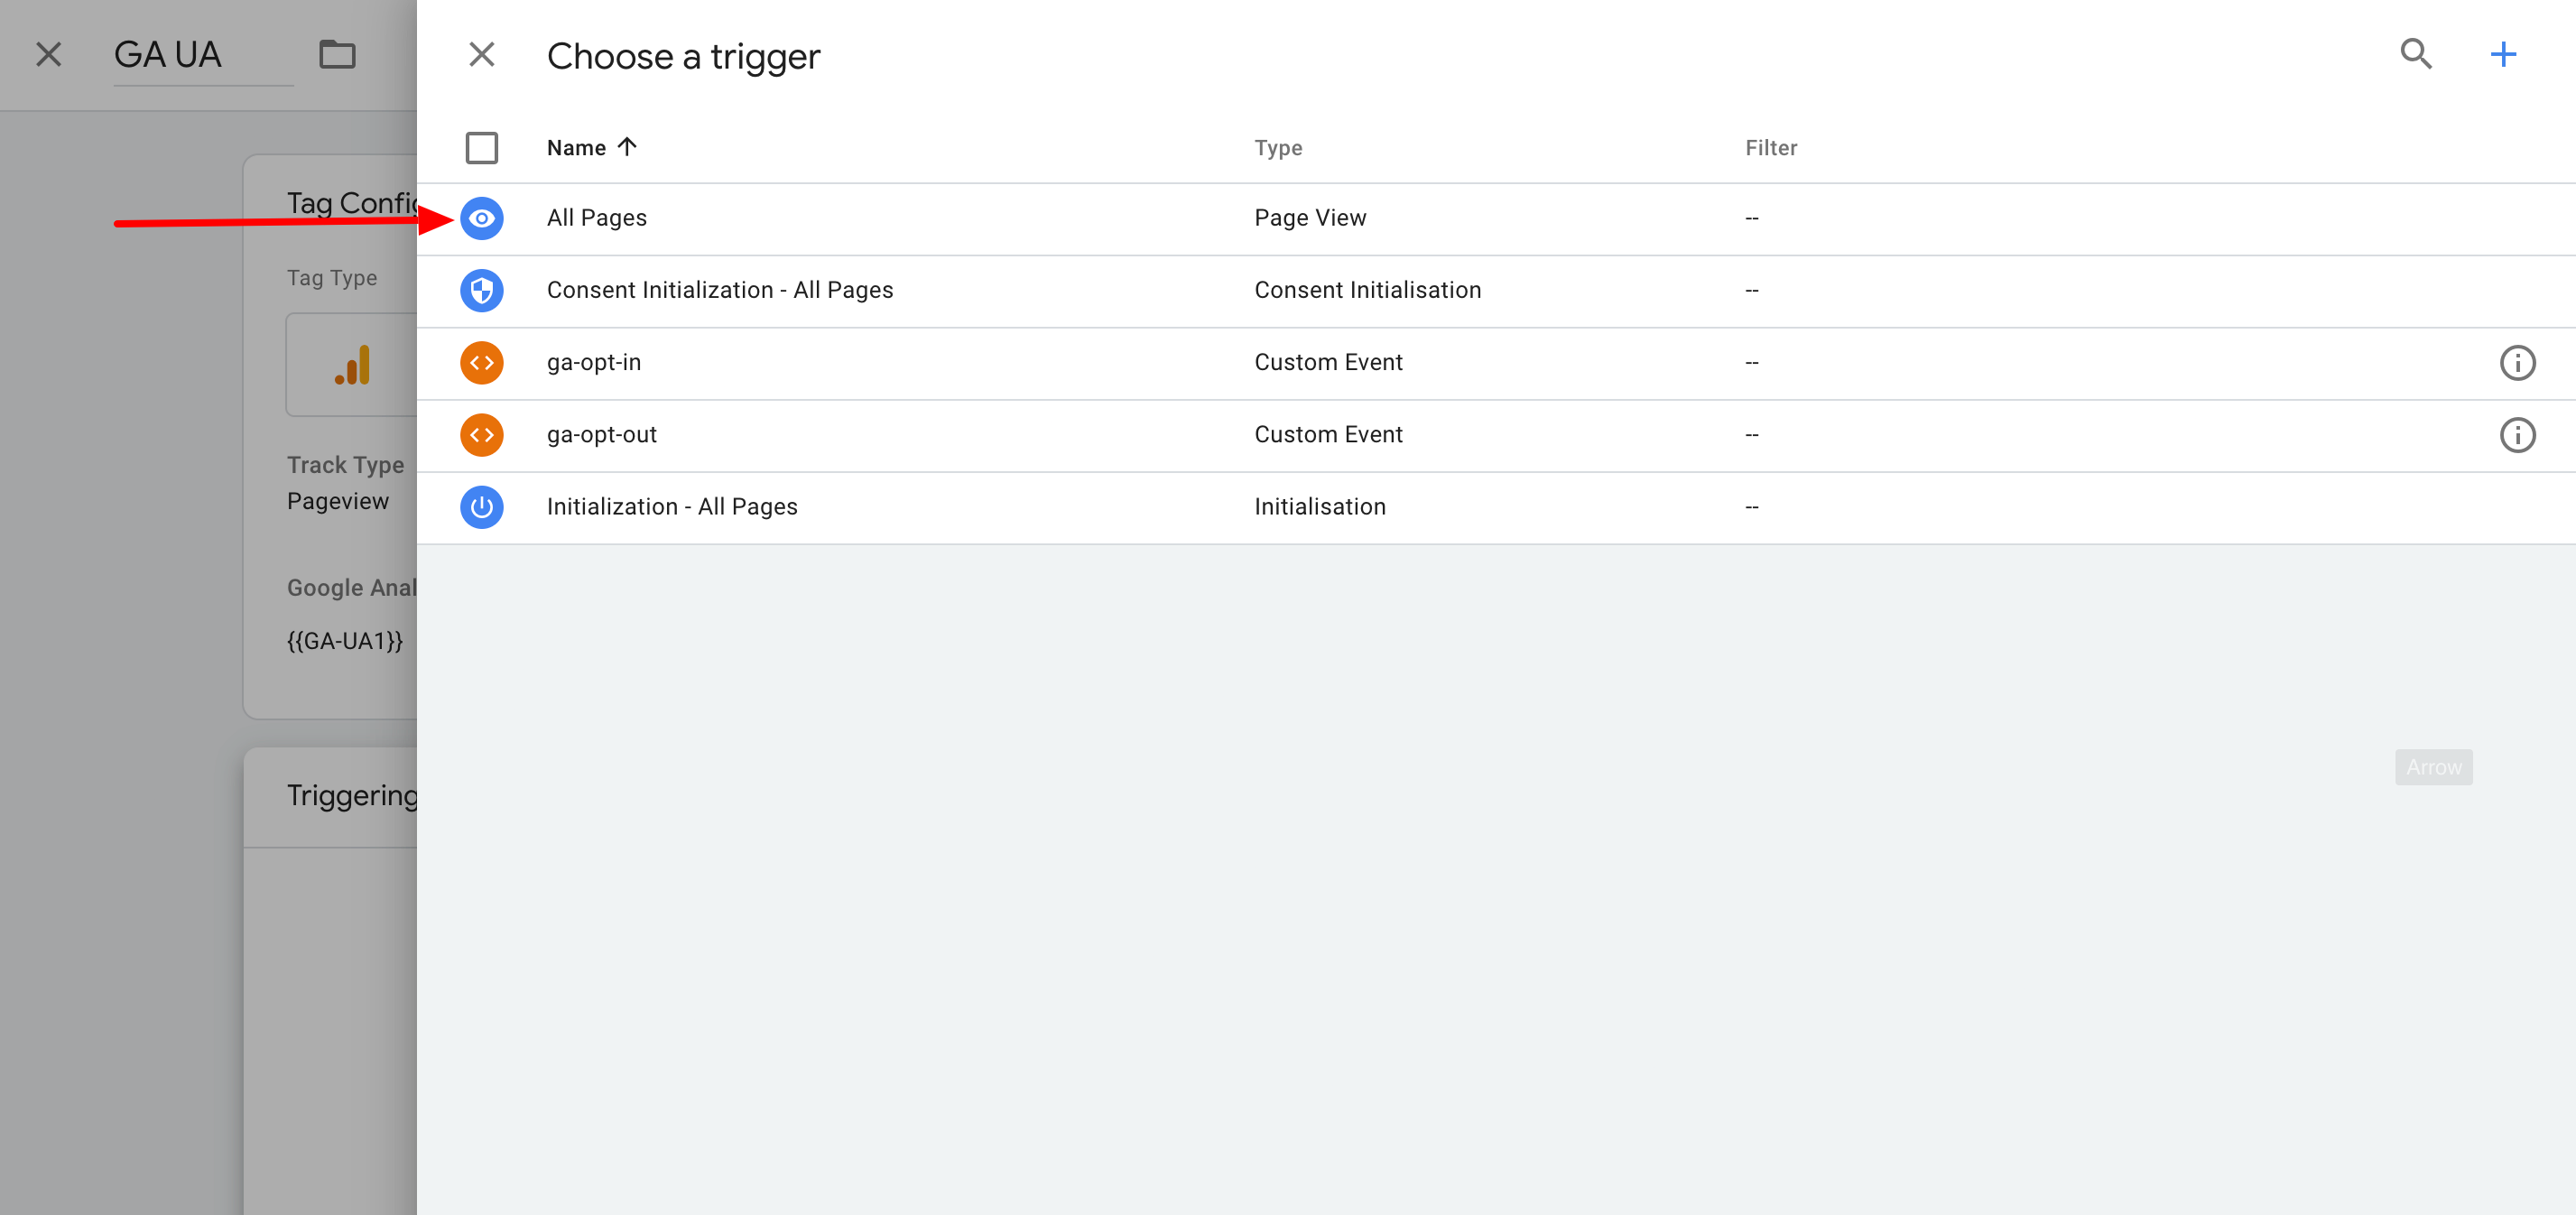
- Now we set up a trigger. 💡 A trigger determines when the tag just set is executed (e.g. when scrolling, when clicking on a specific element). Let’s leave the topic of cookies and consent aside at this point.
- Click on Triggering > All Pages. This will integrate Google Analytics on every sub-page.
- Click on the blue Save button.
- Now the tag is created and Google Analytics: Universal Analytics is integrated into the website. But the change has not yet been published. We will explain how to do this in the next section but one.
Use case 2: Google Analytics 4-Property

- Create a new tag. Give it a name. In our example, we have named the tag GA4.
- Then click on Tag Configuration > Google Analytics GA4 Configuration.
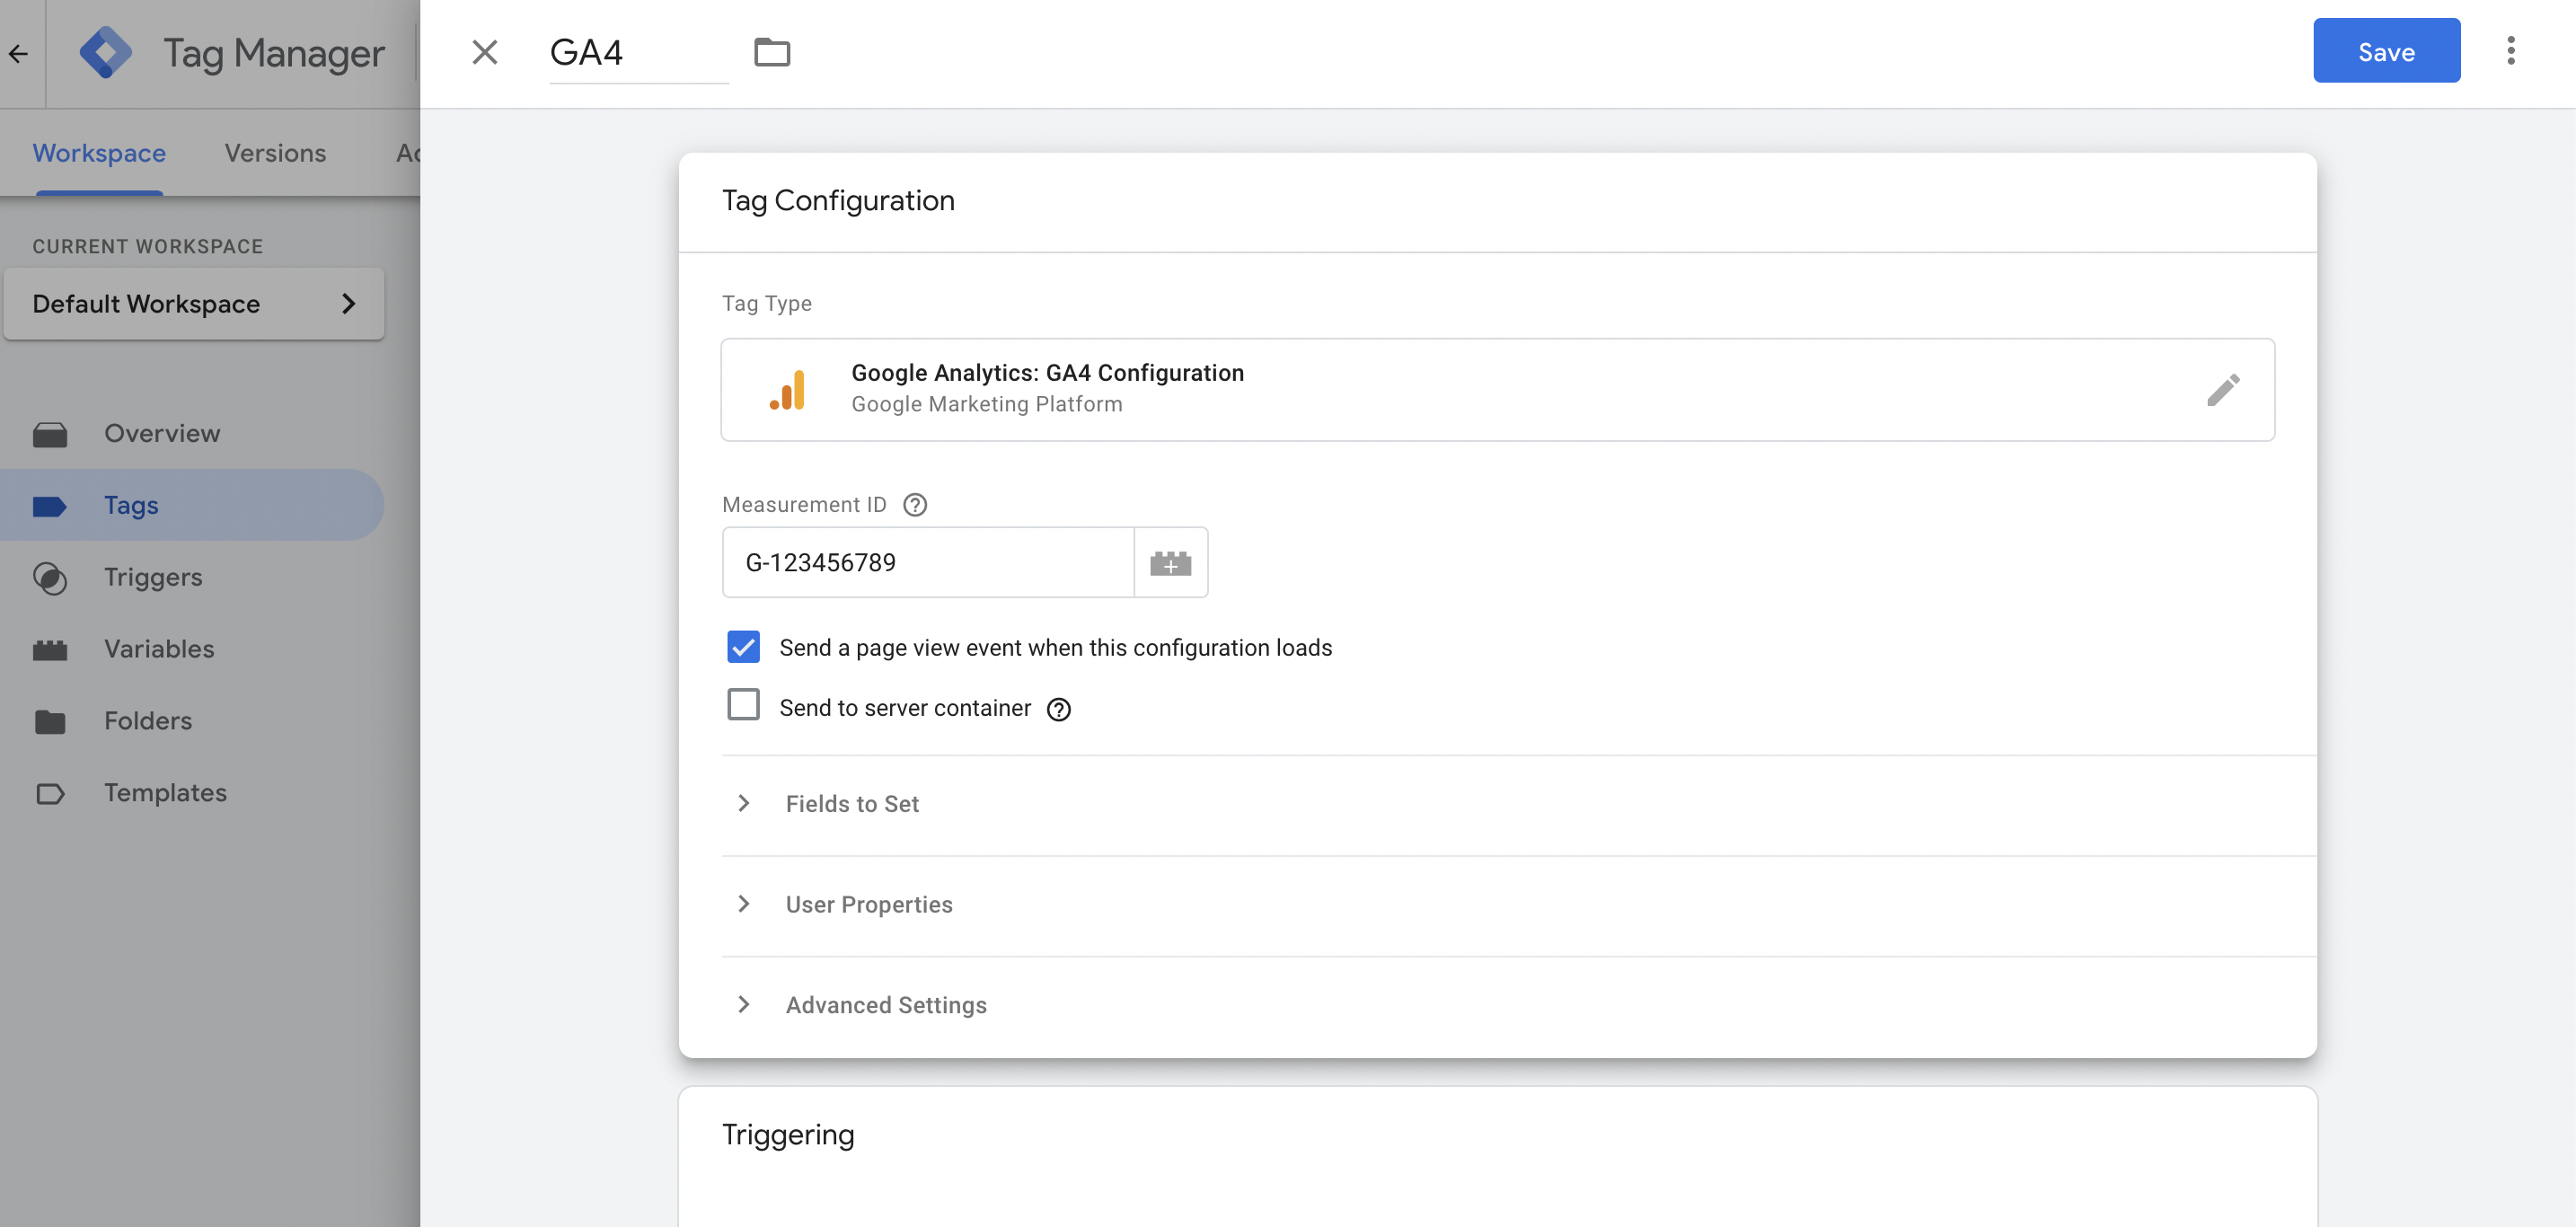
- Enter the measurement ID. 💡 We have already explained above where you can get the measurement ID.
- In this case, you do not need to enter anything in Fields to Set, as Google Analytics 4 anonymises the IP addresses of your visitors by default.
- Create a trigger by proceeding in the same way as from point 22 in the case of Google Analytics Universal Analytics.
- Click on Save.
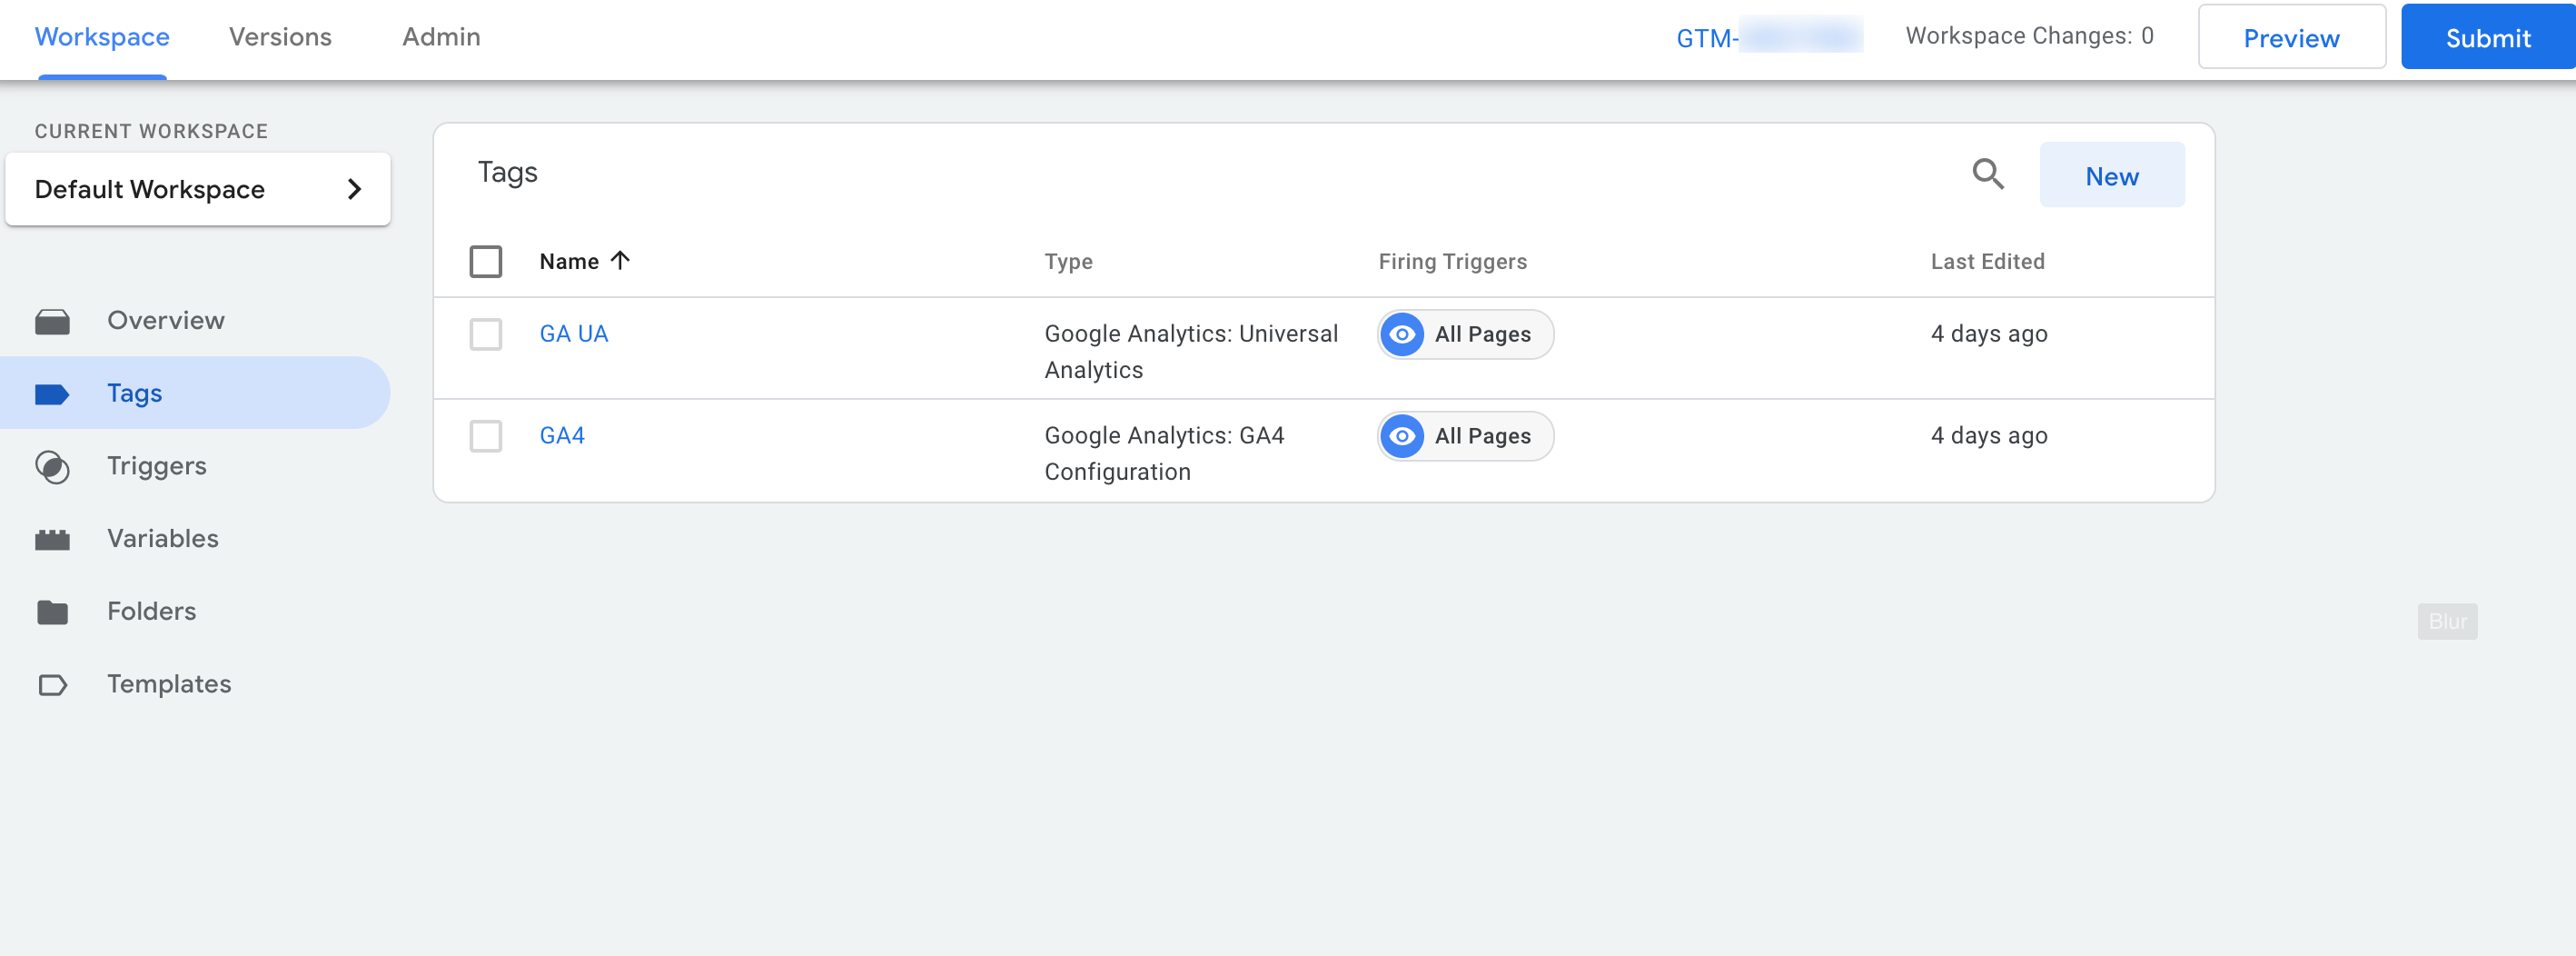
- Now Google Universal Analytics and Google Analytics 4 are run on every page view.
- Important: These container changes are not yet listed for the website visitors. For this, we have to publish the whole thing. We explain how to do this in the following section.
Publish tag changes in Google Tag Manager
Changes you make and save in Google Tag Manager are not immediately visible to your website visitors. This allows you to carry out a variety of complex configurations before you can publish the changes in a controlled manner. We will explain how to do this in the following!
- Click on the blue Submit button at the top right.
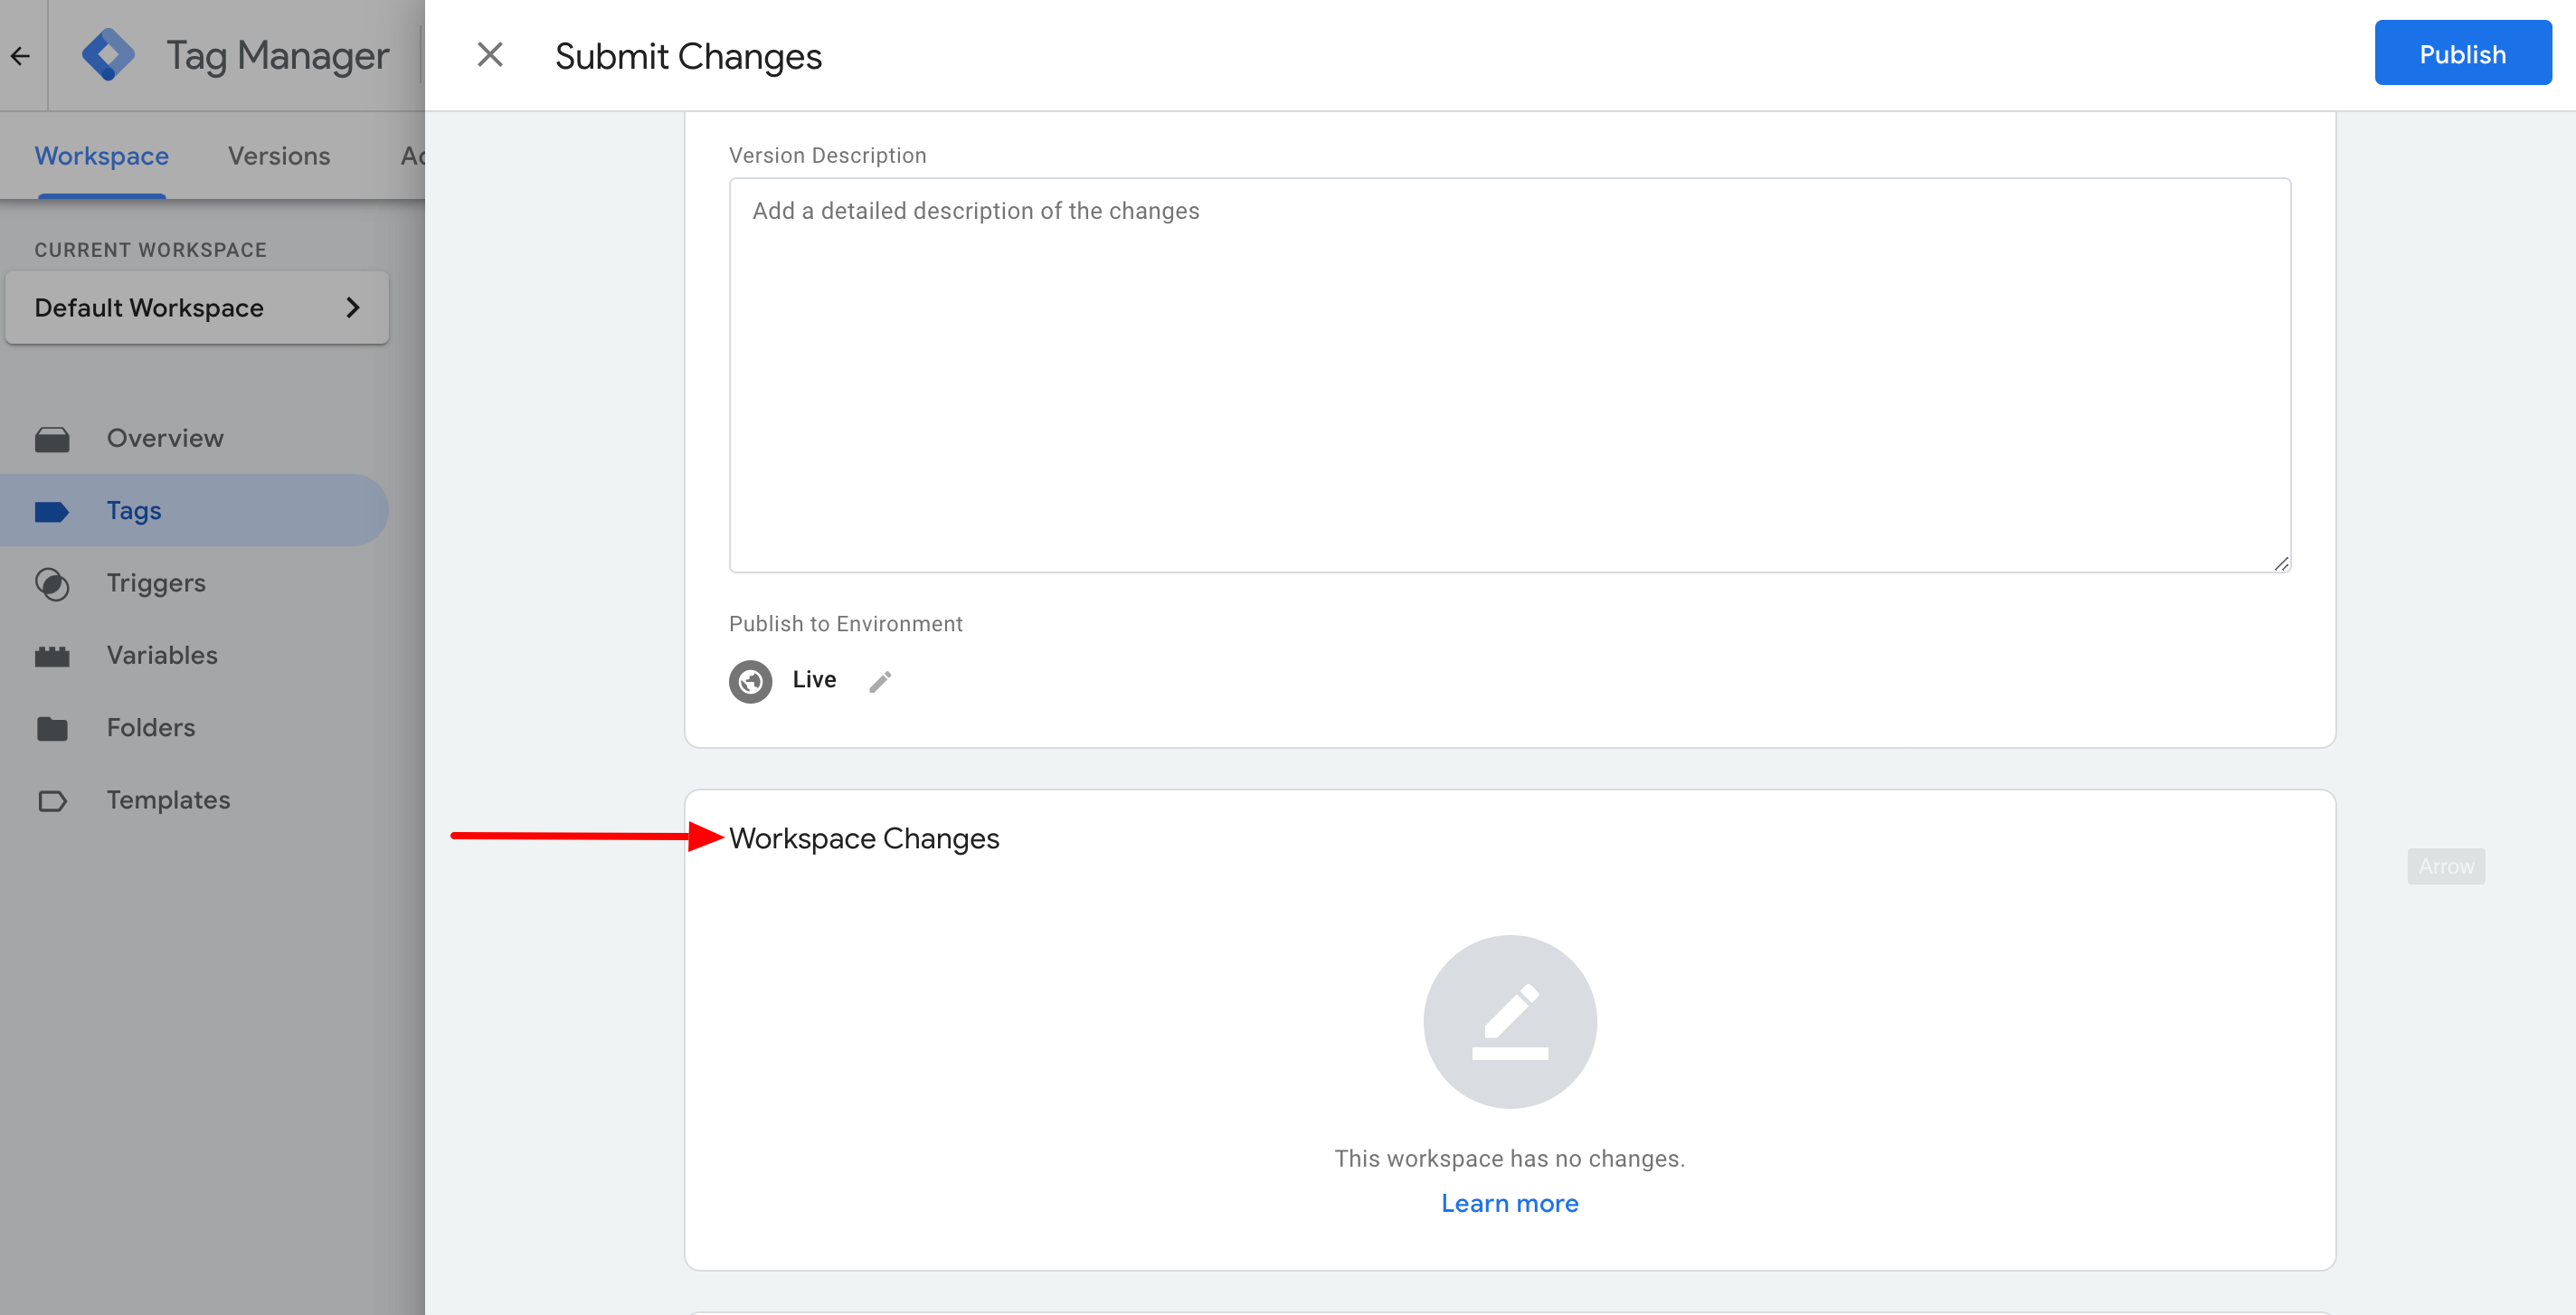
- If you scroll down, you will see the section Workspace Changes. Here you can see the tags you have created.
- Click on Publish. Now a dialogue window opens in which you can enter what exactly you have changed. Alternatively, you can click on Skip.
- Now the tags are published on the website where we have included Google Tag Manager.
How can I integrate Google Tag Manager into my website?
Finally, we only need to clarify how the Google Tag Manager can actually be integrated on your website. It’s easier than you think!
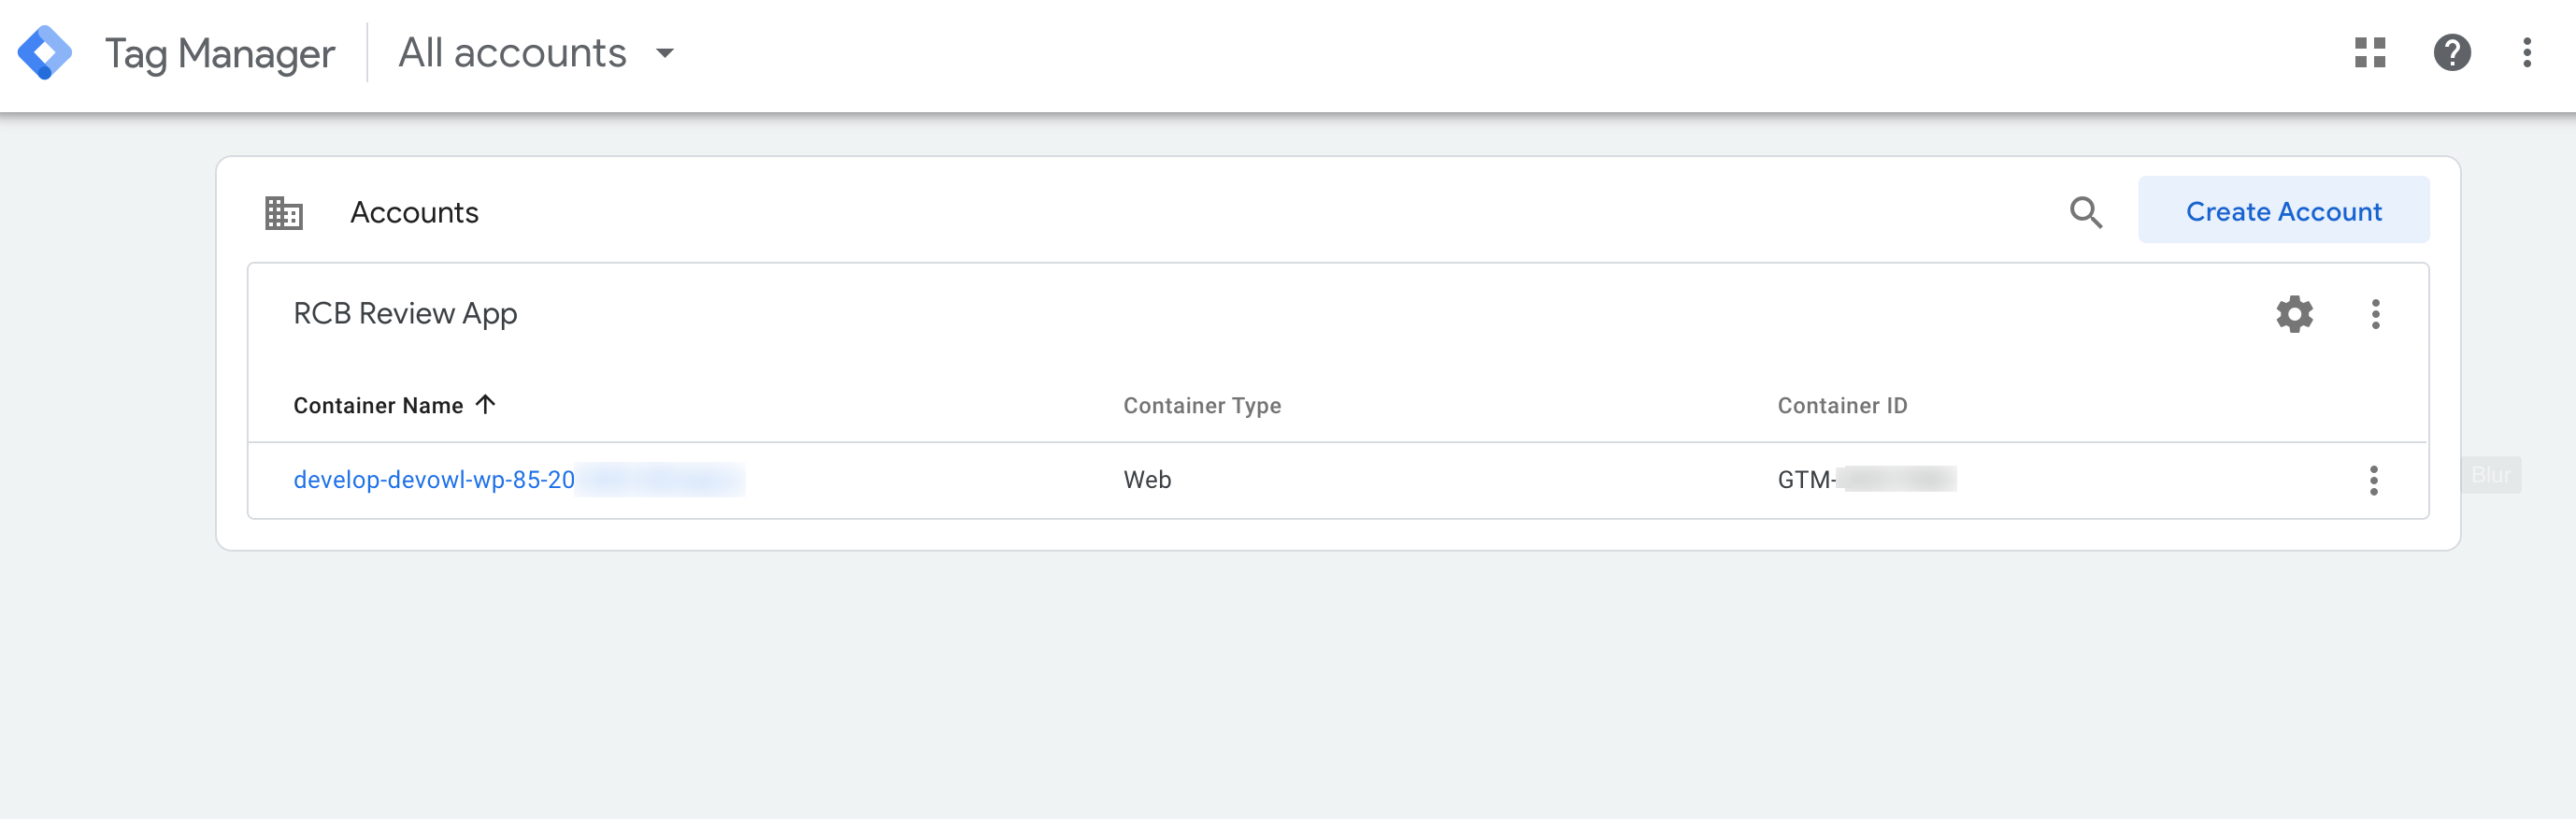
- Go back to your container overview and select the corresponding container to be included.
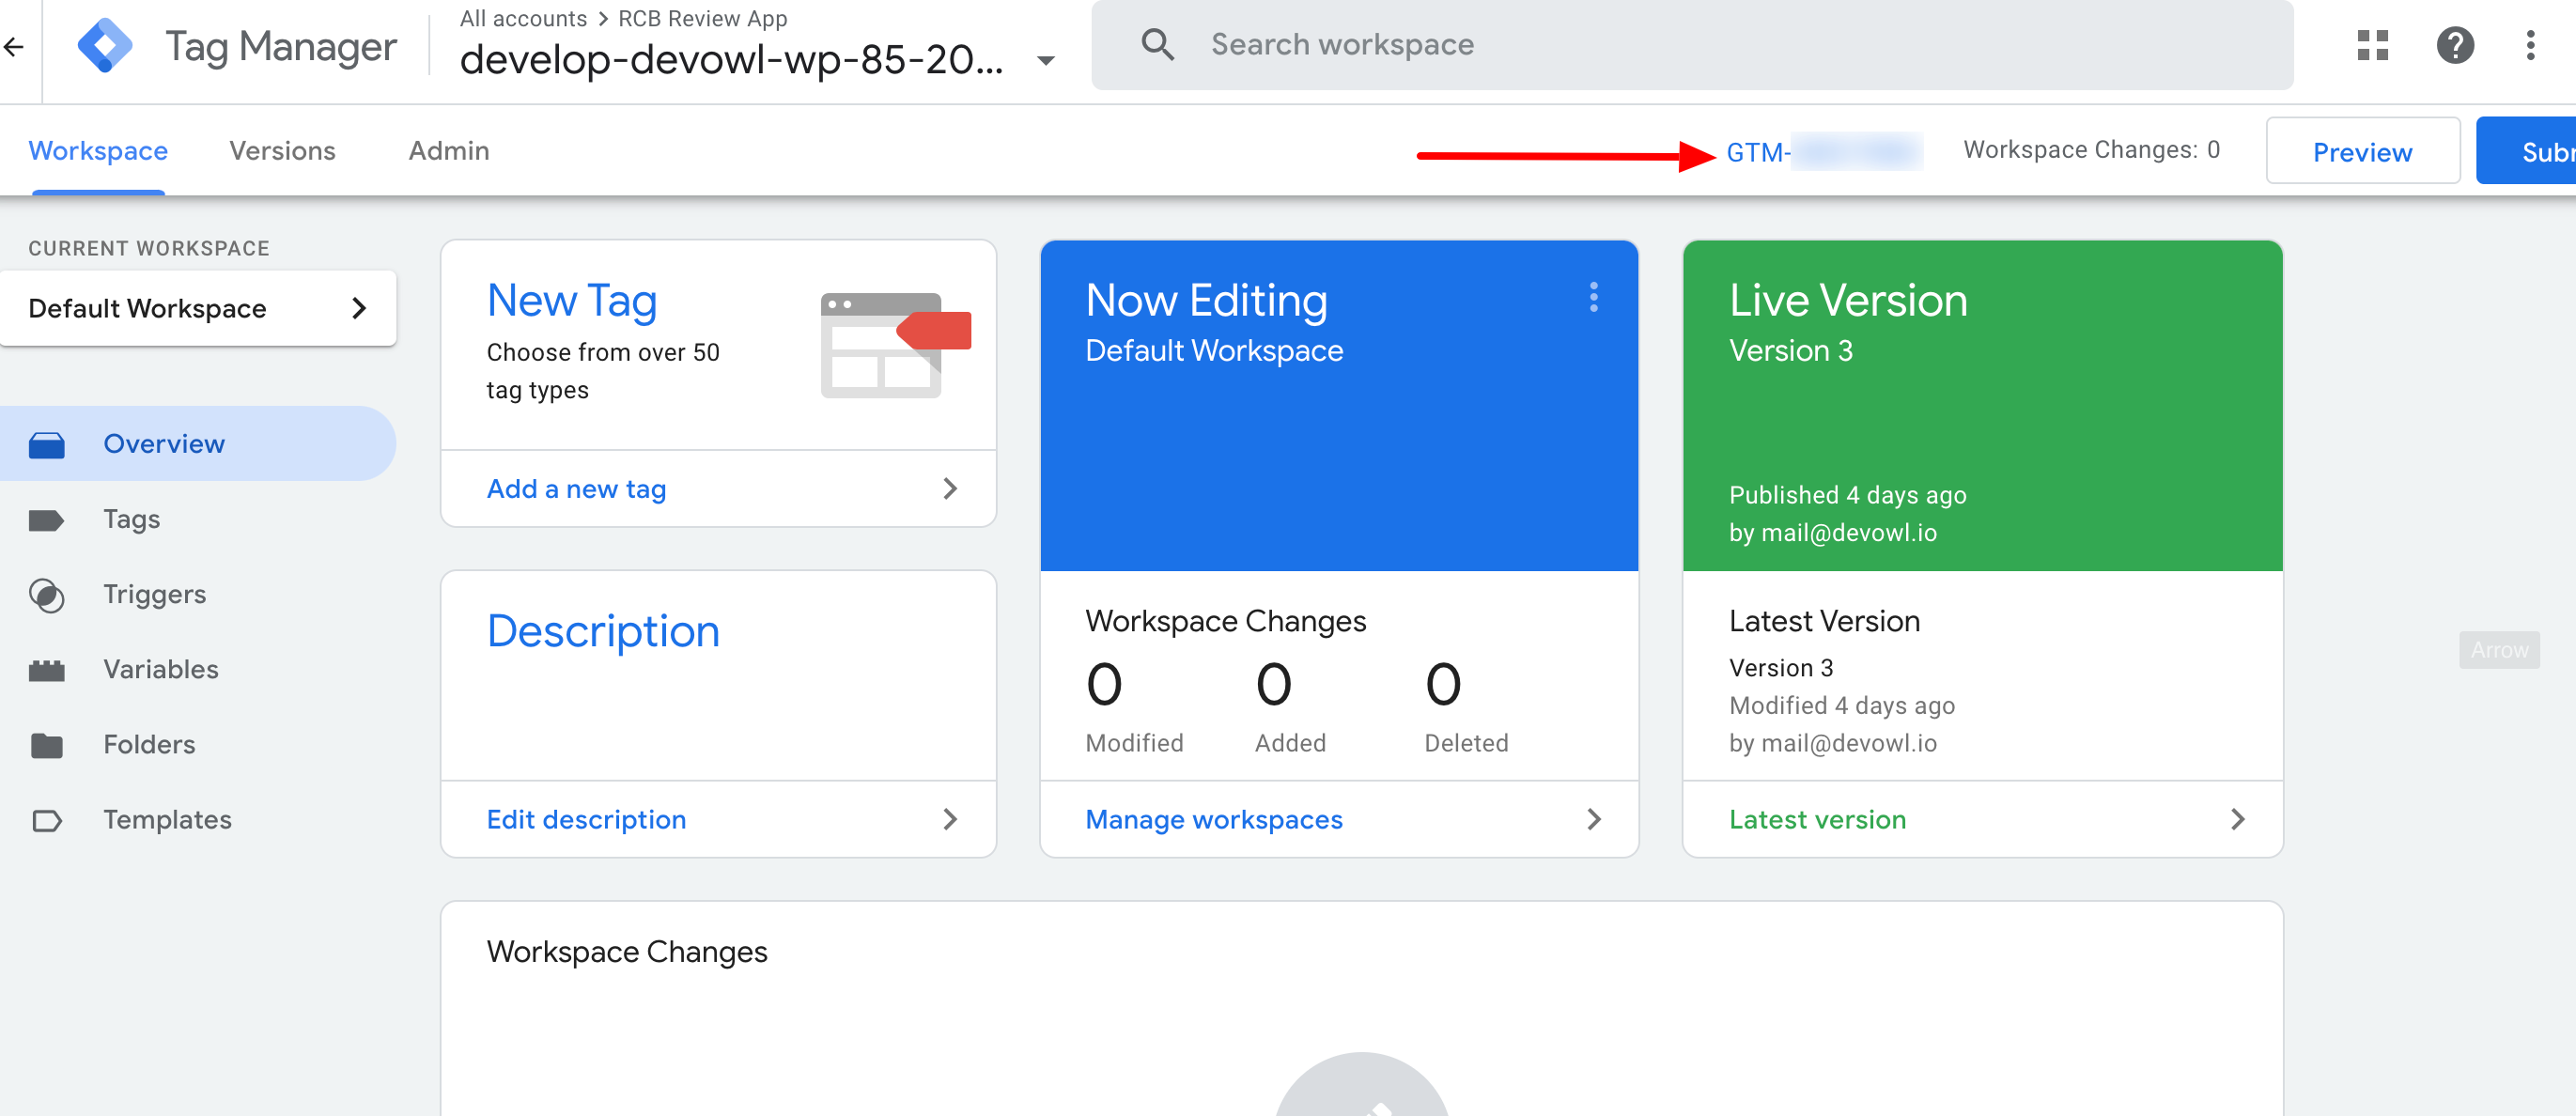
- Click on the container ID (starts with
GTM-). Now a window opens. Here you will find the HTML code that you need to include in your website.
Important: You have now successfully integrated Google Tag Manager into your website – but not yet in compliance with data protection laws!
Phew, finally done. You have successfully integrated the tracking code into your website and can now collect visitor data. Stop, stop! However, it’s not that simple. The topic of tracking should be treated with caution, because there are heavy fines for non-legal implementation..
Tracking usually involves the setting of non-essential cookies and the processing of personal data. However, the data protection-compliant collection, processing and storage of such data can normally only be implemented with active and informed consent.
Since both Google Analytics and MonsterInsights do not help you with this, you need to use a cookie consent plugin like Real Cookie Banner. The WordPress plugin takes care of the setup completely, so that you can integrate Google Analytics, MonsterInsights, Google Tag Manager & Co. into your website with just a few clicks – and without having to write a line of code! And all this in compliance with the applicable data protection regulations 🥳