You have a problem with your WordPress website and want to ask us for help, but don’t know how exactly to explain your problem? Or you don’t even know where exactly the source of the error is?
Then we have a super simple solution for you: You create a new user in your WordPress backend in just a few clicks and send us the access data. This way we can quickly and easily look at the problem for you.
Don’t panic, you can delete the user at any time and thus revoke our access.
How to create a WordPress user
- Open your WordPress backend.
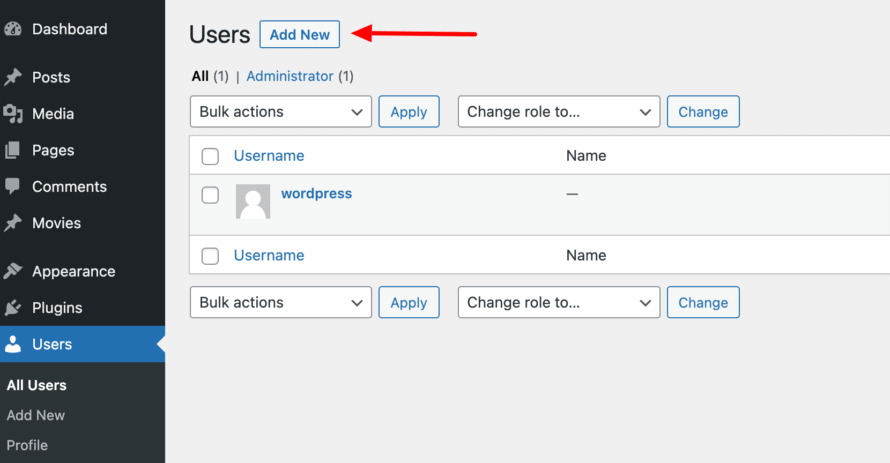
- Click on Users > Add New.
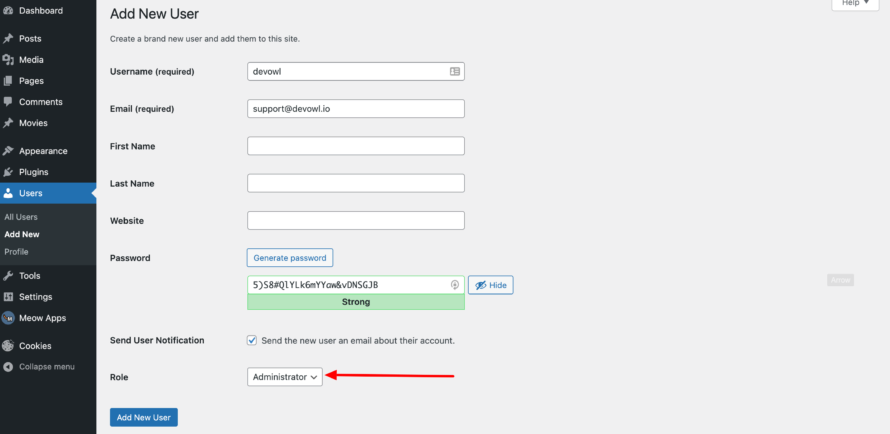
- Now enter a username and an email address (examples in the following screenshot). You can ignore the remaining fields. Important: Please avoid special characters in the username.
- Take the randomly generated password or think of a secure one yourself.
- As a role, you select Administrator so that we have full access to find and fix your problem as quickly as possible.
- After you have set everything, click on Add New User at the bottom.
- Enter the access data (address to the WordPress backend, username and password) when opening or replying to your support ticket. This also applies if you have set the checkmark for “Notify user”, as we cannot always assign your access data to your support ticket.
Tada, the new user is created!
How to delete a WordPress user
We strongly recommend that you delete the newly created user after we have resolved the issue. This will ensure that we do not have access to your WordPress website for longer than necessary. Good news: Deleting a WordPress user is even easier than creating one!
- Go to your WordPress backend.
- Click on Users.
- Hover over the name of the user you want to delete. WordPress will now automatically show you the option to click Delete.
- Click on Delete.
- You will then be asked if you really want to delete the user.
- Click on Confirm Deletion.
Done, the user is deleted again! We will no longer have access to your WordPress website.


